Author: Josh Goodreid
Editor: Adam Richards
Skip To
- Tools and Materials
- Selecting The Proper Oil
- Selecting The Proper Filter
- Draining The Oil
- Replacing The Filter
- Filling With Oil
- Summing Up
In this video I will show you how to change your own oil. After you’re done watching this video you’ll be able to change your own oil yourself, on any car. You’ll be saving money, and you will be ensuring that a high-quality engine oil and filter is going into your car and that you know it’s getting done right. I’m also going to show that you can change your own oil for cheaper than some people think. According to G Miller in this 20somethingfinance article he says that he’s not going to change his own oil because it’s too expensive, $250 for a Jack and $25 for an oil drain pan and wrenches and so on. So I’m going to show you that you don’t need a jack and that you can make your own drain pan. You will need some wrenches but you can get them for relatively cheap($10-$20). Below is the video.
Tools and Materials
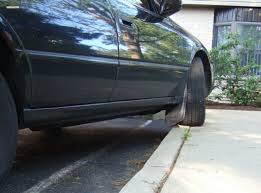
First, let’s get into tools and materials that we need. Again, you are going to need some way to raise the car. In this case we’re going to be using a jack, but a jack is not necessary. One of the common methods broke college student, like me, use is to drive your car on top of a curb.
https://5yong.wordpress.com/2009/06/05/its-all-about-car-engine-oil-change/
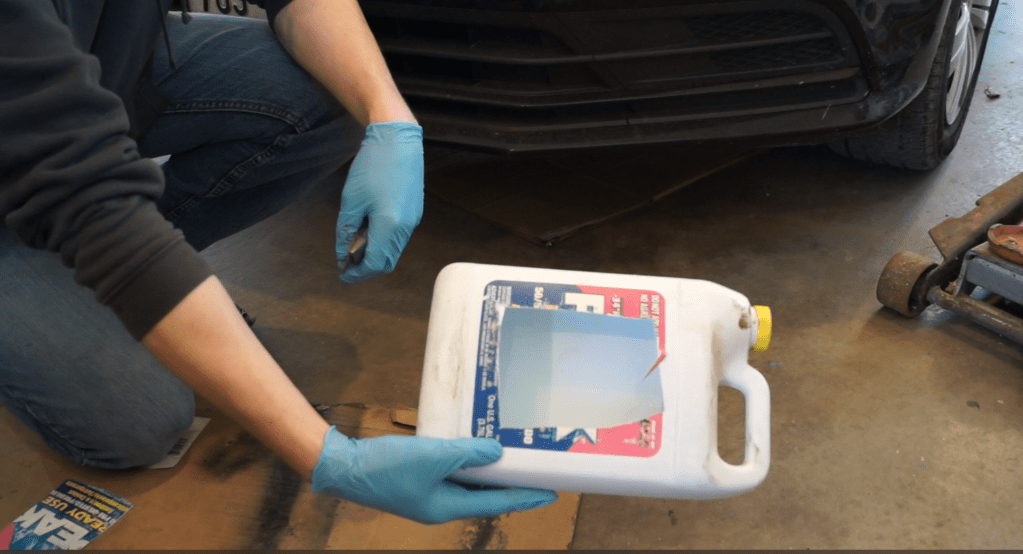
It is the cheapest and safest method because there is no chance it’s going to fall down on you, unlike a jack. Not to mention it gives plenty of room to work. you’re also going to need some kind of wrench or socket. For my specific car I need a mm socket set. This is dependent on your car because I have changed the oil on different cars and only a crescent wrench was necessary. Either way, It’s not a big difference with the crescent wrench being $10, and the sockets being $20. I also needed two Torx screwdrivers to remove a belly pan that was in the way. I think this is a Volkswagen thing so if you don’t have a Volkswagen those are not necessary. You will need some kind of razor blade or scissors to make a oil drain pan out of a jug.
Provided by Author
Next, You’re going to need oil and a filter we will get into what the proper one is and how to find the proper oil for your car later on. We’re also going to need gloves, paper towels, and some kind of a towel, definitely recommend a towel. It’s also recommended that you get some kind of funnel, I didn’t use one so it’s not necessary, but it would help.
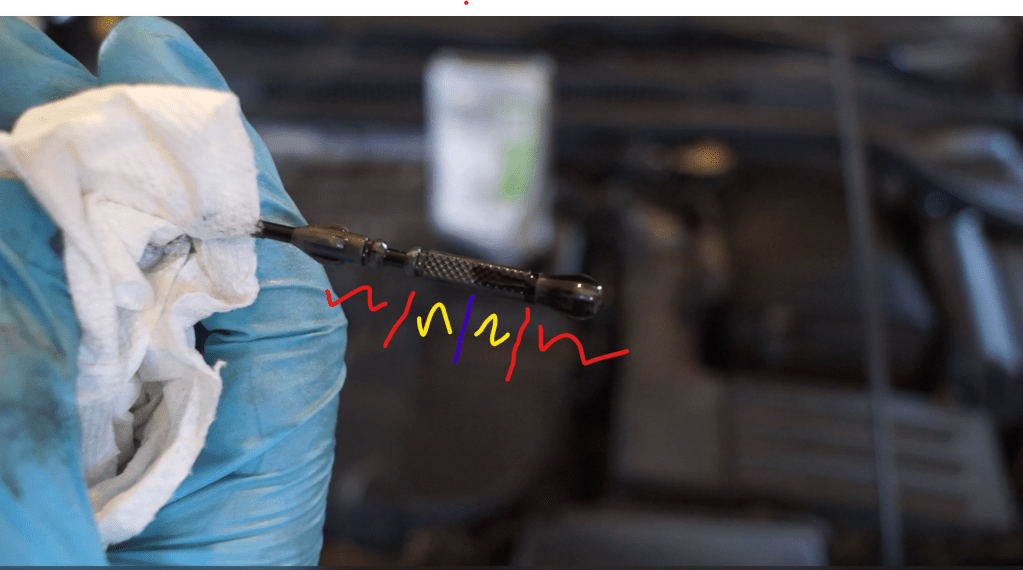
Depending on your vehicle, you may need a tool to loosen the oil filter. My oil filter just has a hex so I can use a socket, but some like this metal one may need a cap type or clamp type. The metal clap types are kind of expensive, so you can instead use a rubber alternative which does the job and is a little cheaper. Just pull it tight and it will crank off. Again, if you don’t have that style of filter it’s not necessary.
Selecting The Proper Oil
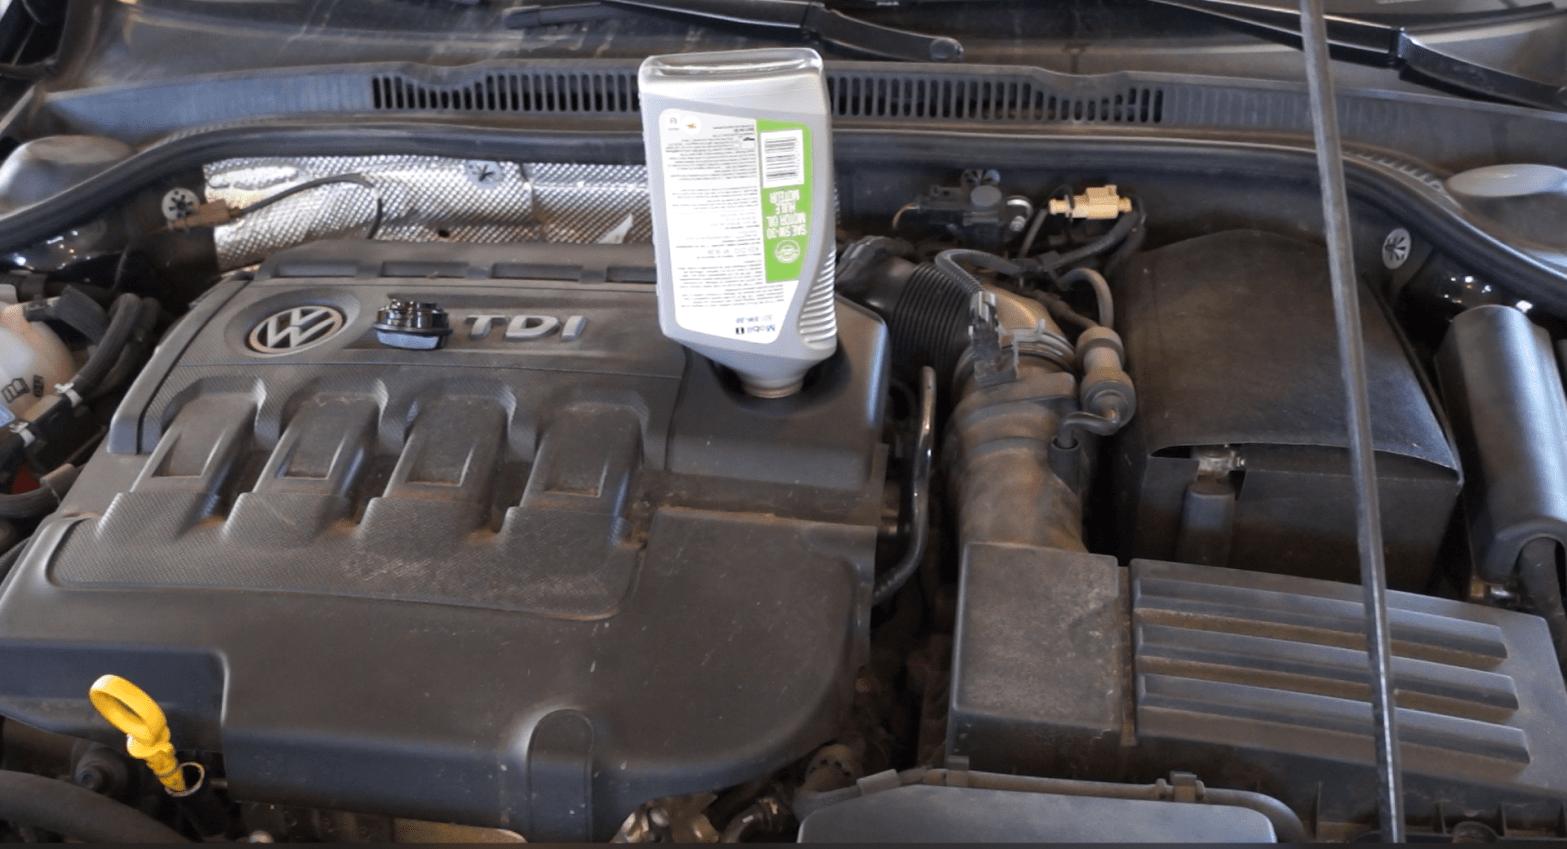
Next lets look into what type of oil we need, what the types mean, and what type you need. What I have here is a 5w 30 ESP Advanced synthetic oil specific to my car, your car is probably going need something different. Let’s look into what all that means so you can pick what is best for your car.
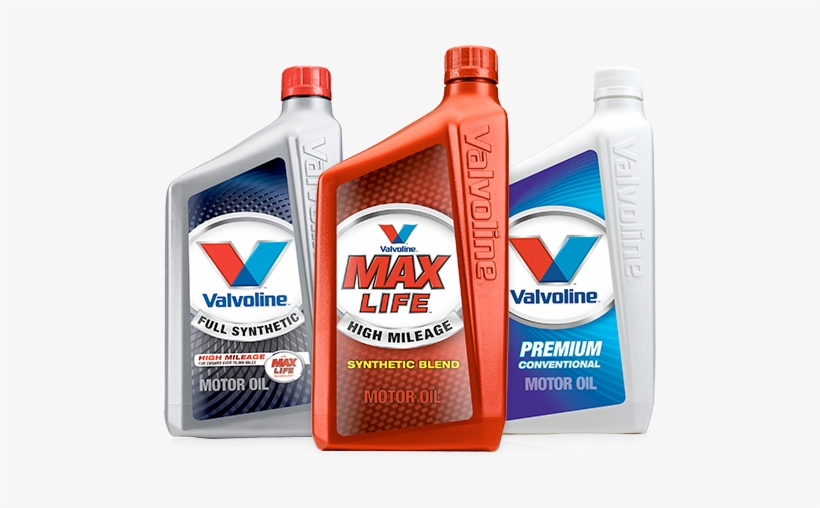
According to Paul Weisler in this Popular Mechanics article the 5W essentially represents the oil’s resistance to thickening when it’s cold and the 30, after it, just does the opposite, It represents the oil’s resistance to thinning when it’s at operating temperature. The other thing to look at is whether the oil is a conventional, synthetic blend, or full synthetic. Keeping with the article before, conventional oil motor is just the standard grade, or the bottom, lower-quality oil. Then, you have a synthetic blend which is a mix of conventional and synthetic, and is used for heavier trucks. Full synthetic is essentially the high-quality oil and is required in newer cars today.
https://oilchangemapleridge.ca/the-right-oil-for-your-vehicle/
As tempting as it would be to get cheap conventional oil, I would recommend getting full synthetic as a minimum if you have a newer engine, because of the damage conventional may do.
Next, how to find what oil your car takes. If you look on top of the oil fill cap under the hood it should tell you what type of oil you need. If not, look in the owner’s manual and go to the section where it says engine maintenance or oil maintenance, flip to the page and It will tell you the oil specification or viscosity and the amount of oil you need. That’s also important when you’re going to buy oil because you don’t want to run out of oil while you’re working on your car and you have no way to get to the store.
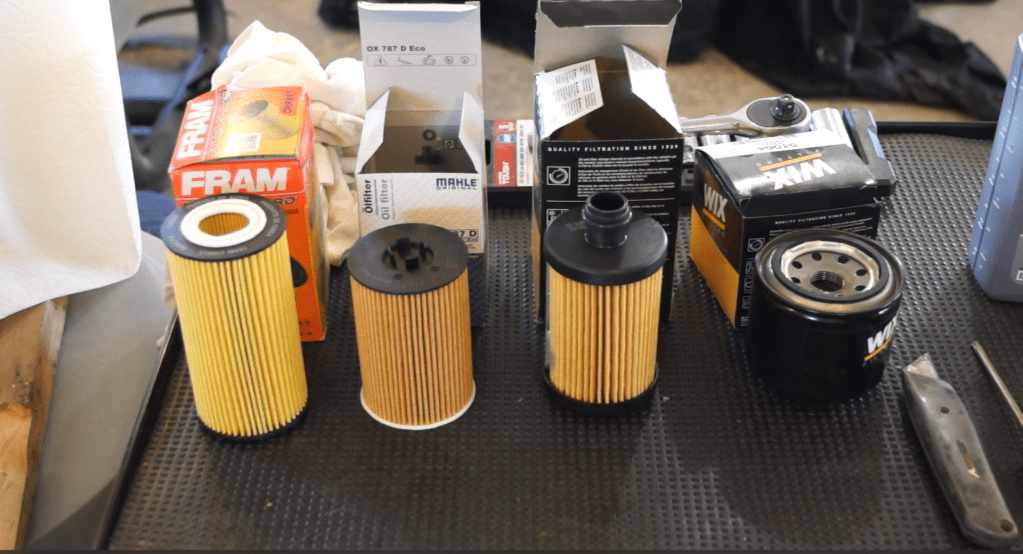
Selecting The Proper Filter
All right, next we’re going to look at the types of oil filters to buy. There are two main types, one is the metal canister type which is older and usually cheaper and the newer type which is a cartridge drop-in. The important thing that you need to know is the numbers on the bottom corner of the box. These tell what type of filter it is. To find out what filter is needed for your car, here is a website (Wix filters) where you can type in the make and model of your car and search the filter by the motor.
Provided by author
Draining The Oil
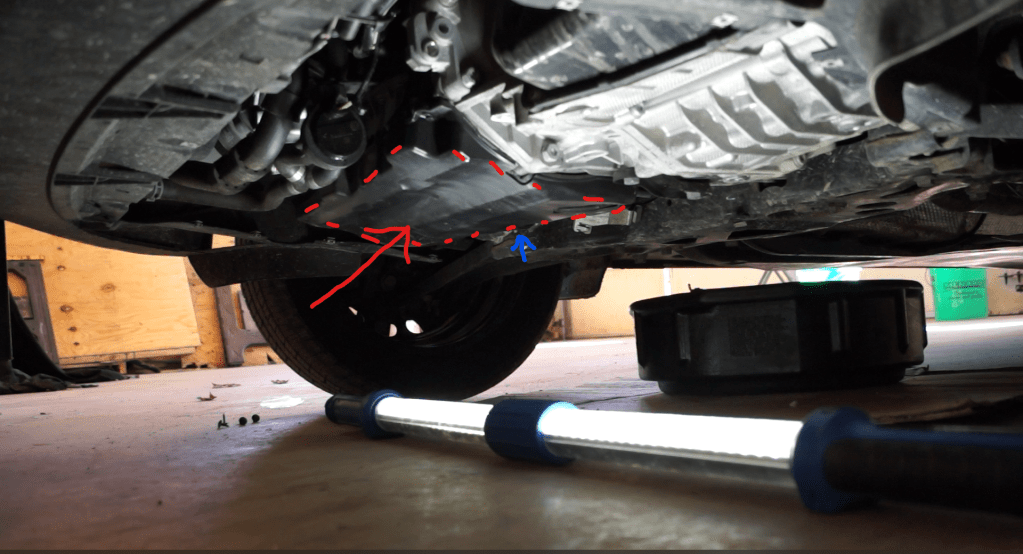
Now that you have the materials, we need to go jack up the car (in my case). Put a block underneath the rear tire, put the car in park and pull the emergency brake. Next, we need to jack on a piece of the frame to ensure that the vehicle lifts properly. Now the frame on my vehicle is deep inside the car. If your unsure look underneath your car and feel for metal. Jack once you locate the metal frame. Once jacked up, put jack stands underneath the car to ensure it doesn’t come down. Also give the car a good shake. If it’s going to come down you’d rather have it come down while not underneath it. Next, I need to remove a plastic belly pan, ignore if you can already access the oil pan and move onto locating the filter. As you can see here, this is my oil filter which is in front of the oil pan.

Provided by author
With most front wheel drive cars, the oil pan is going to be near the passenger side and is going to be a black container. The other silver one is the transmission, which you do not want. Now, you need to take the drain plug out, the location is normally toward the back, and remember lefty loosey. It might be a little hard to get off, if that’s the case, you can slide a pipe on the end of the ratchet or wrench and it will give you more leverage which helps to get it off. Put your oil drain pan underneath the plug, take the drain plug out, and let it drain for 10 to 15 minutes or at least until it’s a slow drip. Again, I would give this plenty of time because the point is to get the dirty oil out. Once you’re done, put the drain plug back in right away so you don’t forget. When you’re tightening this, put your hand really close to the socket so you have lower leverage which keeps you from over-tightening the plug. Once finished, go back and give it a small turn using the end of the wrench, just slightly.
Provided by author
Replacing The Filter
Now on to the filter. Move the pan underneath the filter, use a wrench if you can’t get it off by hand, and unscrew and let drain into the oil pan. Once you have your oil filter out I would compare it with the new one that you bought to ensure that you got the right part. If you have a canister like I do you need to replace the O-ring seal and when you do, it’s wise to spread a little oil on it to ensure there’s a good seal and that it goes on tight without ripping or catching. Then, put the cartridge back in and reinstall. When you’re screwing this together, do it very slowly and very carefully, it’s plastic and could break very easily. You shouldn’t have to force it. If it seems hard, loosen it up and try again. I would recommend tightening it with a wrench if the filter is a cartridge type, because they leak if done by hand. If it’s the metal type ignore.
Filling With Oil
Finally, we need to fill the car up with oil. Make sure there’s nothing underneath the car like the jack stands from before and lower the car. If you’re using the curb method you can ignore this step for now. Now, we’re going to locate the engine oil cap. The dipstick is yellow and you don’t want to fill from there.

Provided by author
This is where you can use a funnel. I have done this many times so I know that I need 6 quarts total, but your case maybe be different. So fill about a quart at a time and check the dipstick until full. If you bought oil in a gallon jug, it actually has transparent material on the handle which will tell you liters and quarts, so you know exactly how much to put in so you don’t overfill. Next, check the dipstick by insuring it is down all the way and then pulling it up and examining it with a rag. In our case it is about half-way between the low and high mark which is perfect. This is very important, start up the engine for 5 to 10 seconds to cycle the oil and make sure it fills the filter and you get the proper level. If you’re using the curb method, I would recommend driving your car off the curb and onto level ground at this point. Once the vehicle is shut down, it is normal for the level to drop by about one quart. Fill and check the oil level until full.
Provided by author
Summing Up
Well congratulations, you are almost done. Close the hood, if you have any extra oil I would put it in the trunk, you never know when you might need it, and dispose of any oil and trash properly. Throw any trash away and bring the used oil to your local recycling center.
Now lets look at the total amount I spent. According to Amazon 5 W 30 oil is $20, the Jetta filter was $8, the crescent wrench is $10 and a socket set is $20. Total is $48 and obviously once you have the tools you don’t need to buy them again. So, the future cost is only $28 for the oil and filter. Now, let’s compare this to the cost of a professional oil change. According to a Car and Driver article with a Mazda Miata tested in Michigan being brought to multiple local shops. The price ranged from $69 to $95. On the high end, that is $67 cheaper.
All in all, you save some money and you get to have some fun along the way. Thanks for reading and I hope you learned something.
References
Weissler, Paul. “How to Navigate the Confusing Task of Picking the Right Motor Oil.” Popular Mechanics, Hearst Digital Media, 18 Oct. 2019, http://www.popularmechanics.com/cars/car-technology/a53/what-oil-does-my-car-take/.
Miller, G.E. “DIY Oil Changes: Are the Cost Savings Worth It?” 20somethingfinance.Com, 20somethingfinance.Com, 21 Jan. 2019, 20somethingfinance.com/diy-oil-change-cost-savings/.
Ceppos, Rich. “How Much Does an Oil Change Cost?” Car and Driver, Car and Driver, 6 Mar. 2020, http://www.caranddriver.com/shopping-advice/a27380975/how-much-is-oil-change/.
