By: Marissa Steele
The importance of baking is the way that it brings people together. Baking could be used for quality bonding time or to bring to some sort of a gathering to share. My grandpa taught my family and I how to make this pie. It is how we spend most of our time with him, he teaches us how to make all sorts of baked goods. Baking can also help you grow as a person, it teaches you how to carefully follow directions. Recipes can be very precise in the way that you add some ingredients together in a certain order. There are also specific tools that work more effectively that will be shown in the recipe. This article will go in depth about everything you need to know as a beginner while baking an apple pie.
Some basic materials that you will need to complete this task is an oven, a pie pan, mixing bowls, apples, a rolling pin, a blending fork, and pie ingredients. When you are choosing your pie pan it is important to know the differences between a metal and glass pie pan. Metal is the better heat conductor. It has the right amount of thickness not only to heat and brown quickly but also to cool off quickly once the pastry is perfectly golden brown. Glass, on the other hand takes time to heat even in a 400-degree oven. It also takes longer to cool down after you take it out of the oven so you risk burning the crust. I used a glass pie pan for this pie and found that it took longer for the crust to cook, the recipe said 45 minutes but I ended up cooking it for about 55 minutes to get the crust crispy and golden brown. The most crucial ingredient in an apple pie is an apple of course. There is a science to finding good baking apples. They recommend that you use firm apples, they could be firm and sweet or firm and tart, it is up to your preference. Braeburn, honeycrisp, pink lady, and granny smith apples are among the best. There are also gala, granny smith, and fuji. You can choose among any of these apples and will be more than satisfied with the way your apple pie turns out!
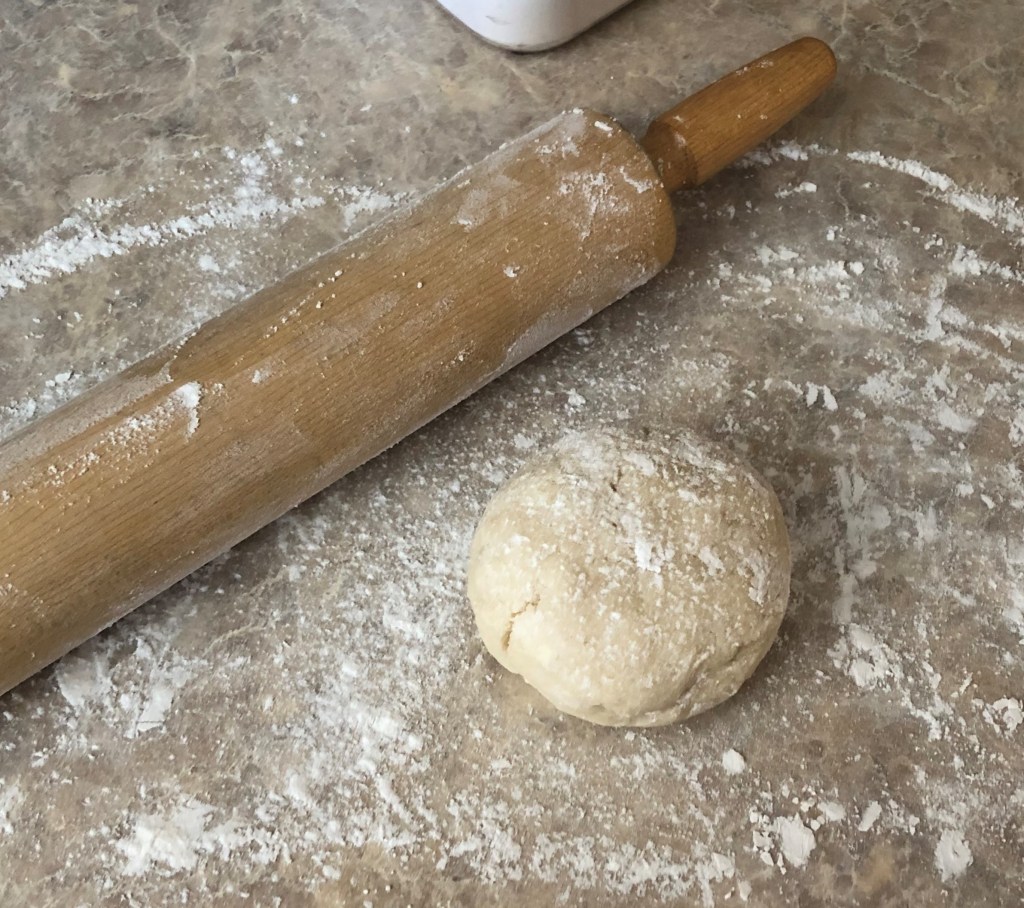
Any good pie starts with a solid crust. The kind of crust I made today was called a butter crust. It is made from scratch which takes some time and muscle but will pay off in the end result of the pie. This crust consists simply of butter, flour, salt, sugar, and water. You first cut the butter into half-inch cubes and add it to your dry ingredients. The tricky part about making this crust is the technique of “cutting” the butter into the flour. To do this, you just take your fork to the butter, flour, salt, and sugar in a bowl and press the dry ingredients into the butter. Your arm may get a little sore as you will be mixing for some time, but continue to do this process until the pieces look like small peas. Then, you will slowly add six tablespoons of water, one tablespoon at a time, into the dry butter mixture by still using the same cutting technique, pressing it all together with the fork. Once you have it evenly mixed you will roll it into two even balls with your hands and stick them into the fridge to cool.
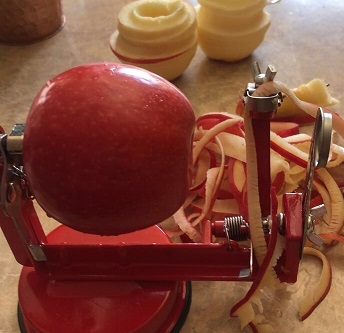
Now that you have your crust cooling in the refrigerator, you can begin putting the filling of the pie together. You will wash 5-6 large baking apples of your choice; I am using pink lady apples. The apples need to be peeled and have the cores removed. To do this step, we have this slick device called the apple machine. This will peel, slice, and de-core your apple all at the same time.
Once you have all of your apples peeled, transfer them to a cutting board. You will start by cutting your apple in half, then quarters, then cut each of the quarters in half again. This will give you the perfect bite-sized apple pieces for inside your pie. See images below for clarification.
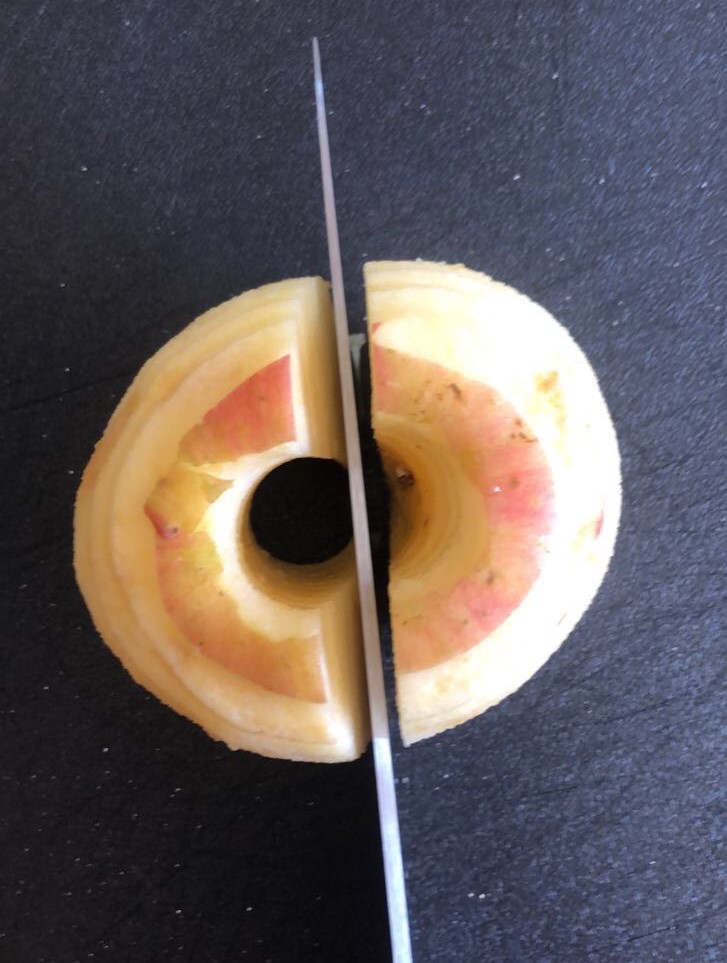
half 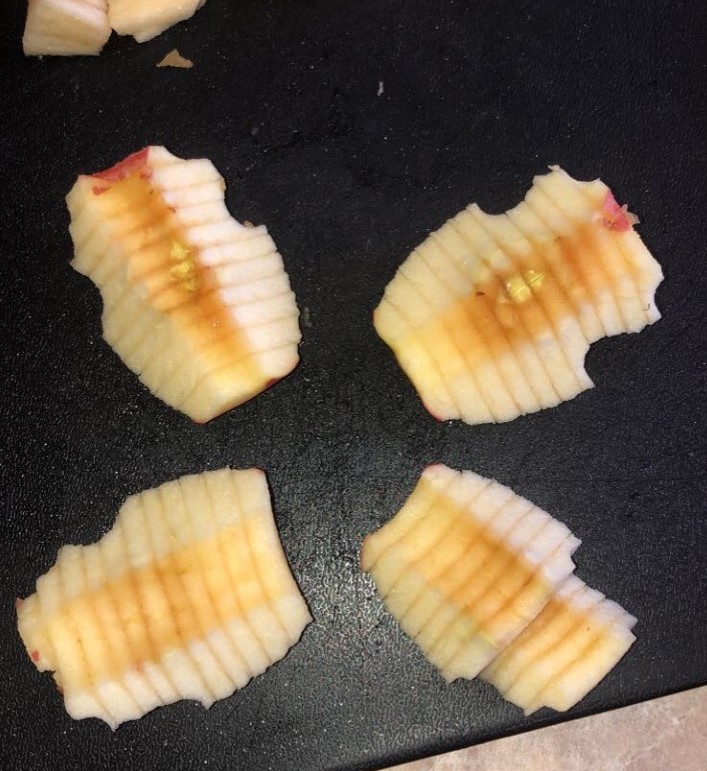
quartered 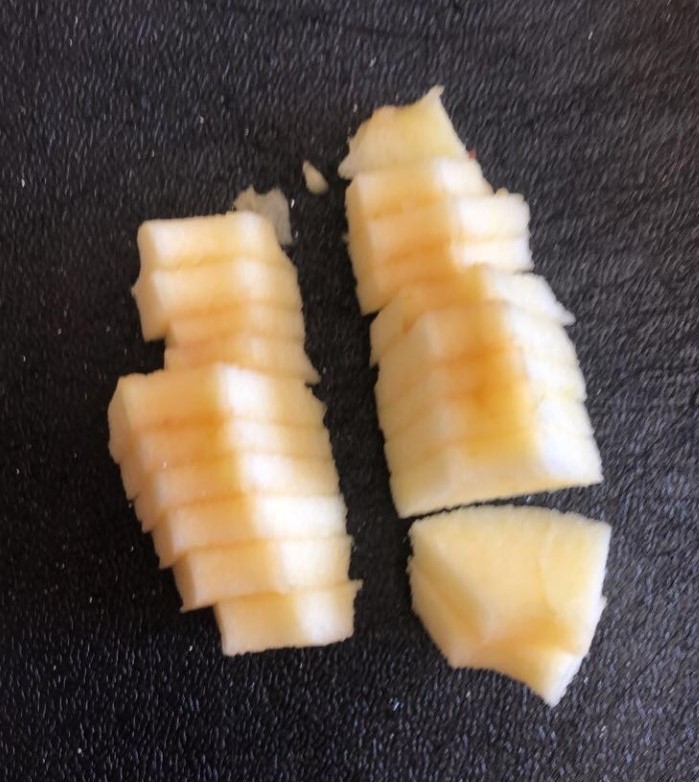
quarter cut in half
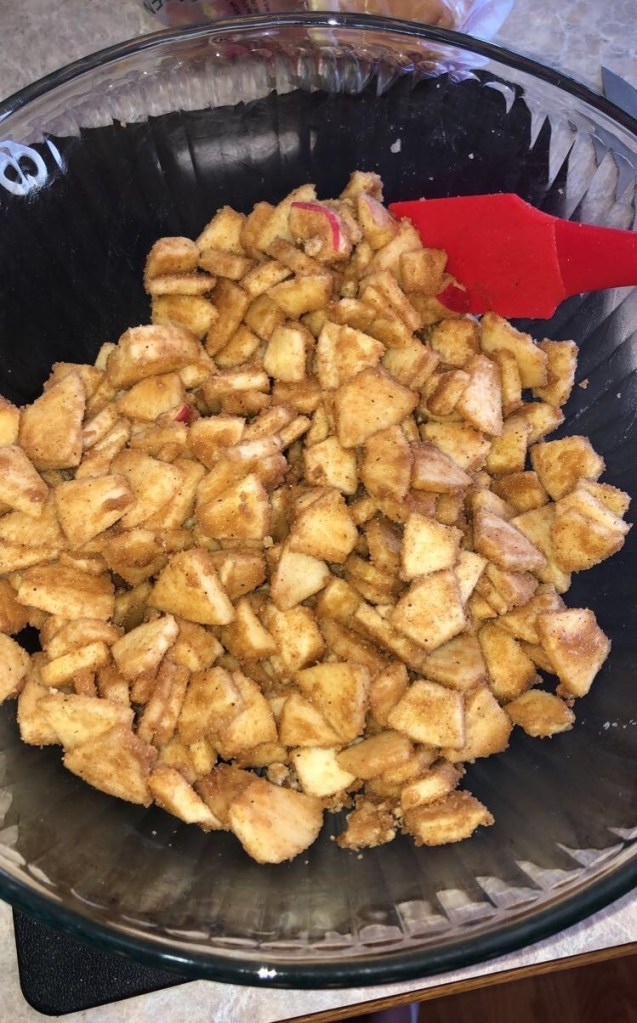
Take four or more cups of your apple pieces and put them into a large mixing bowl. Next, we will be seasoning the apples. You will need brown sugar, flour, cinnamon, nutmeg, salt, and a little lemon juice. I know you must be thinking that is a lot of dry ingredients, how will that all get mixed in evenly? Well, the apples have some of their own juice in the bowl which will help balance out the wet and dry ingredients to get make sure all the apple pieces get coated evenly. First, you will want to mix only the brown sugar, flour, cinnamon, nutmeg and salt together in a separate bowl, then add that mixture to the apples. Once it is evenly mixed, add the lemon juice and mix again. Your mixture is then complete and should look something like this.
Next, we need to get the balls of dough out of the fridge that were made earlier to roll out into a crust. There are a few tricks to doing this successfully. First, find a clean counter top and spread a thin layer of flour on that surface. Place the ball of dough on the flour, get a large rolling pin and also cover the rolling pin in a thin layer of flour. This will keep the dough from sticking to the counter and also from sticking to the rolling pin. Then begin to roll out the ball of dough into as close of a circle as you can make it.
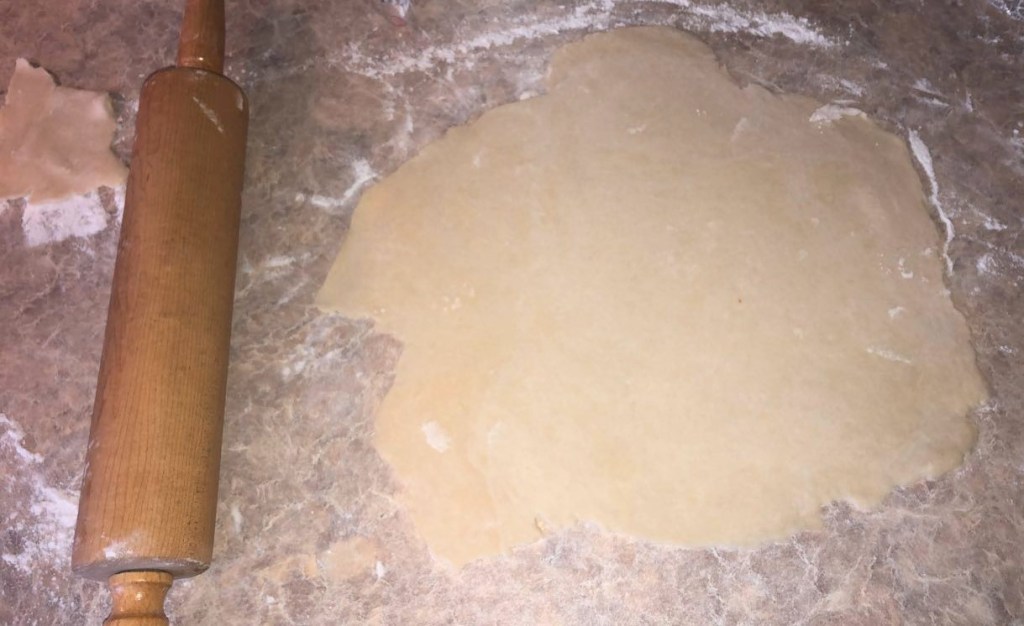
When rolling the dough, don’t use too much pressure as that will make the edges of the dough crack severely. You won’t get your crust rolled out perfectly into the shape of a circle without any cracks along the edge, but this will reduce the severity of the cracks. Roll the dough in all directions to get as close to a circle as possible and continue to do so until the crust fits the pan and is about 1/8th of an inch thick. Roll out the other ball of dough following these same steps.
Then transfer one of the rolled-out crusts into the pie pan and add the apple filling. Spread it evenly to fill in all the empty spaces. Place four ¼ inch butter slices to the top of the mixture. Finally, to top of the pie, we are going to make a lattice pie crust using the other rolled out crust. This process is tricky to get a hold of, but once you understand the pattern it is easy to catch on. Using the other rolled out cruse, take a pizza cutter to cut about one-inch strips into the dough parallel to one another. Then follow the steps below to see the pattern.
1.) Lay out 4 to 7 parallel strips of the pie dough, depending on how thick your strips are, on top of the filling, with about 1/2-inch to 3/4-inch space between them. Fold back every other strip.
2.) Place one long strip of dough perpendicular to the parallel strips as shown. Unfold the folded strips over the perpendicular strip.
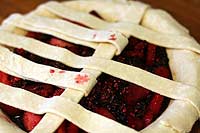
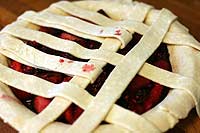
3.) Now take the parallel strips that are running underneath the perpendicular strip and fold them back over the perpendicular strip, as shown. Lay down a second perpendicular strip of dough next to the first strip, with some space between the strips. Unfold the folded parallel strips over the second strip and continue this process until the weave is complete over the top of the pie.
Now for some finishing touches, we will want to trim the edge of the pie. I just trimmed right around the edge of the pan with a knife and didn’t bother pinching the edge. Then moisten the upper crust with some water by just wetting your hands and patting the water on top, it doesn’t have to be too wet. Use just enough water so that when you sprinkle the top with sugar, it sticks. Be careful not to add too much sugar as it will burn. Then bake in your oven at 400 degrees for 45 minutes or until the crust is crispy and golden brown!
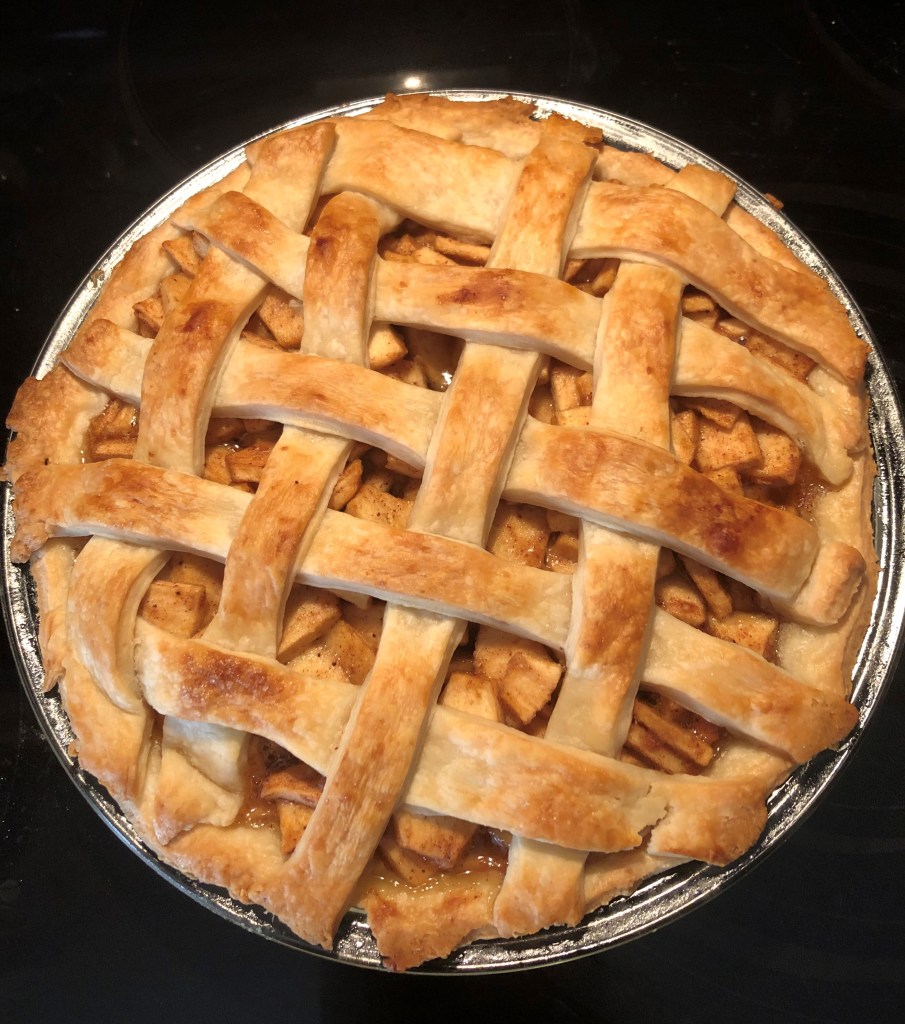
A few extra tips are to place your pie on a cookie sheet in case any of the filling boils over while cooking, then you won’t have a mess to clean up in the bottom of your oven. Also, wrap the edge of the pie in tin foil to keep the edges from burning. Finally, after all that hard work you successfully baked a delicious pie. Baking is a great way to spend your time and accomplish something in a day. I usually am not the best baker so if I can successfully make this recipe, you can to!
Sources:
https://www.simplyrecipes.com/recipes/how_to_make_a_lattice_top_for_a_pie_crust/
https://www.bonappetit.com/test-kitchen/cooking-tips/article/the-3-best-apples-to-use-for-baking
https://www.chicagotribune.com/news/ct-xpm-1991-07-18-9103200715-story.html
