https://www.maangchi.com/recipe/tongbaechu-kimchi
Kimchi is a staple of Korean cuisine made of salted and fermented vegetables and is one of the most important banchan (side dish) and can be found at every Korean meal. My father discovered his love for this dish while he was stationed in South Korea in the 1980s, and as he made it at home over the years, I found a love for it myself. There are hundreds of different varieties of kimchi, all with different preparations, ingredients, and flavors. Even among a single variety of kimchi families will have their own method of preparing it. The Korean word kimchi translates to fermented vegetable, though not all varieties are fermented and can be eaten fresh. In this article I will explain to you how to make the Baechu variety, a spicy and fermented Napa cabbage kimchi.
Ingredients and supplies
For this recipe you will need:
- 1 large Napa cabbage
- 1 Korean radish
- 8 garlic cloves
- ¾ cups Korean chili flakes
- 4 Green onions
- 1 Medium sized carrot
- Salt
- Rice flour
- Sugar
- Fish sauce
The basic ingredients for Baechu-kimchi are Napa cabbage, Korean radish, green onions, carrots, garlic, salt (kosher or iodized will work), fish sauce, sweet rice flour, sugar, and dried and ground chilies. If all these ingredients are not available, then a premade kimchi sauce can be found at any Asian food market. This recipe will show you how to make your own kimchi sauce. For preparation, you will need the largest bowl you have, a small pot, a mixing bowl, a cutting board, a large knife, and a large mouth 2qt mason jar with a lid. If a 2qt jar is not available, then two 1qt jars will do. A large Napa cabbage, about two pounds, will make about two quarts of kimchi.
Preparation
The first step to preparing kimchi is to cut and salt the cabbage. Start by taking two pounds of cabbage and quartering it longways. Trim off the hard stem and cut the cabbage into 1-2” long pieces. The leaves could be left long if you desire but cutting them into bite sized pieces makes it easier to eat, and helps it ferment faster. After cutting the cabbage, rinse it off with water and place it in your large bowl and salt it with about ¼ cup of salt, tossing it to ensure it is evenly salted. Let the now salted cabbage sit for 2 hours, turning it over every 30 minutes. This both seasons the cabbage and causes it to give up its water, making it soft and easier to pack into jars. After those 2 hours, rinse the cabbage under cold water to remove any remaining external salt.
Additionally, because this is a fermented dish, salting the cabbage will kill off any dangerous bacteria that could cause your batch to go bad. With the bad bacteria gone, this creates an environment for the lactic acid bacteria (necessary for fermentation) to thrive.
While waiting the 2 hours for the cabbage to absorb the salt, you can prepare the porridge to make the sauce. Start by boiling 1 cup of water in your small pot with 1 tablespoon of sweet rice flour. Boil for 5-10 minutes until it starts to bubble. And 1 tablespoon of sugar and boil for another minute until the sugar dissolved and the mixture is slightly translucent. Remove from heat and let it cool completely.
To make the kimchi sauce, pour the now cooled porridge into your mixing bowl. Add 6-8 minced garlic cloves, ½ to ¾ cups Korean hot pepper flakes (gochugaru), and 4 tablespoons of fish sauce. The fish sauce can be found at every Asian food market and is one of the most important ingredients. It gives a fishy, savory, and ever so slightly pungent flavor to the kimchi. However, if you’re a vegan, or just don’t like this kind of fishy flavor, then about 2-3 tablespoons of soy sauce will be a good substitute. If you are a fan of this kind of falvor and want even more, adding 2 tablespoons of fermented salted shrimp (saeujeot) to your kimchi sauce will provide you with a greater fishy/umami flavor profile.
Now that the sauce has been made, add to the bowl 4 chopped green onions, 1 cup Korean radish matchsticks, and ½ cup carrot matchsticks. If you have finished salting and rinsing the cabbage, pour the sauce over the cabbage and toss it over repeatedly until every piece is coated and all of the chopped vegetables are evenly distributed.
The kimchi can now be packed into your jars. The jars must first be thoroughly washed in hot water. After the jars are filled, they must be covered with a lid, but be sure to screw the lid on loosely. As the kimchi begins to ferment it will give off carbon dioxide as the bacteria begin to propagate and do their work. If this gas cannot escape, then the pressure may cause the jars to crack or explode.
To begin the fermentation process, place the loosely covered jars on your counter or table, out of the sun, and let them sit at room temperature for 2 days. After about 12 hours you will notice bubbles coming up from inside the jar. This means that the bacteria are doing their job. Once a day you should tighten the lid, shake the jar to ensure every piece is still covered, then break the seal again. After those 2 days, the kimchi will be ready and you may put the jars in your refrigerator to halt the fermentation process and preserve it for up to 4 weeks.
Consumption
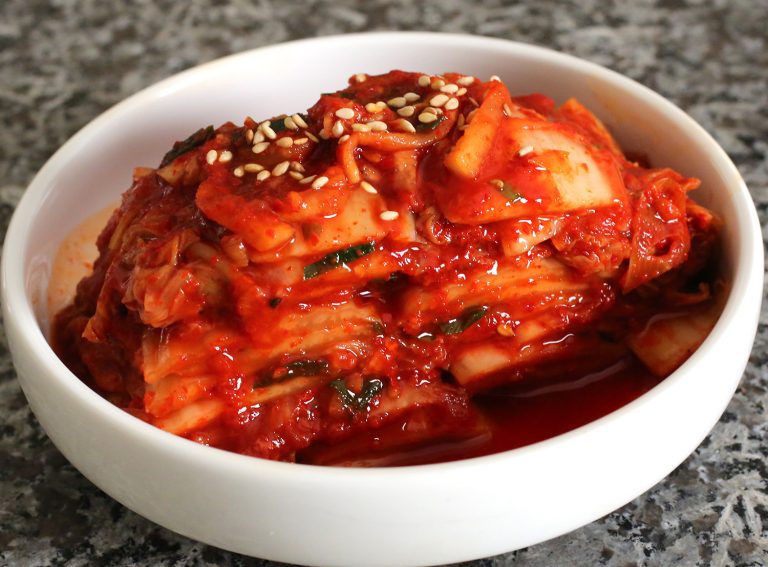
Kimchi is one of the most versatile side dishes in the world. This variety can be eaten fresh or fermented. If eaten fresh, it will be sweeter and firm. If fermented it will be more sour, spicier, and crunchy. When fermented it can be eaten on its own, over rice, or with grilled or barbequed meats. It can even be added to ramen to give a spicy and tangy flavor to what would otherwise be a boring bowl of noodles. Any dish that you can imagine that you feel would pair great with a spicy and savory side dish would go great with kimchi, and after learning how to make it, if you come to love it as much as I do, you will never run out.
Works Cited
Manngchi. “Napa cabbage kimchi.” Manngchi, June 22nd, 2014. https://www.maangchi.com/recipe/tongbaechu-kimchi
