How to get started camping in Wisconsin

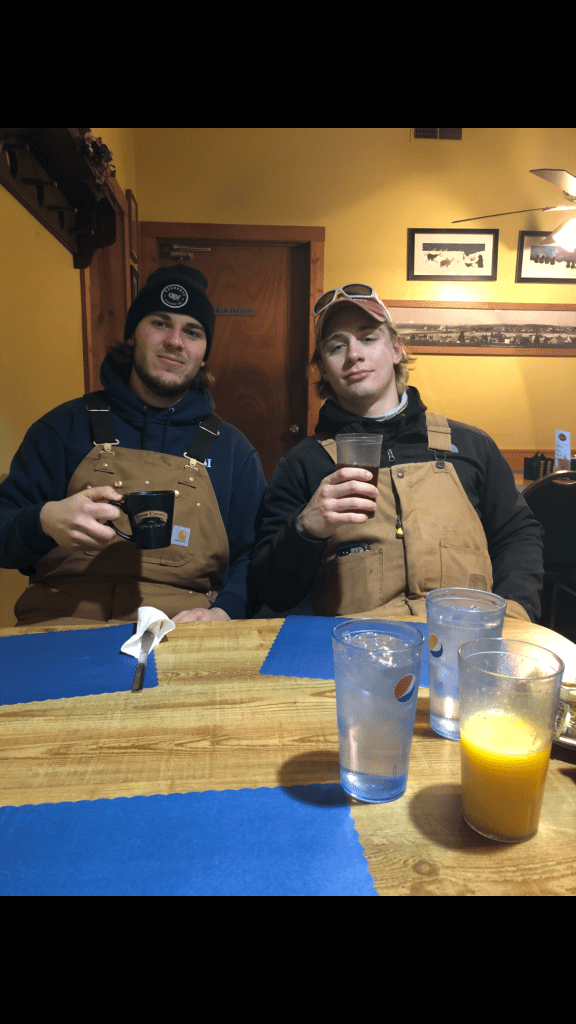
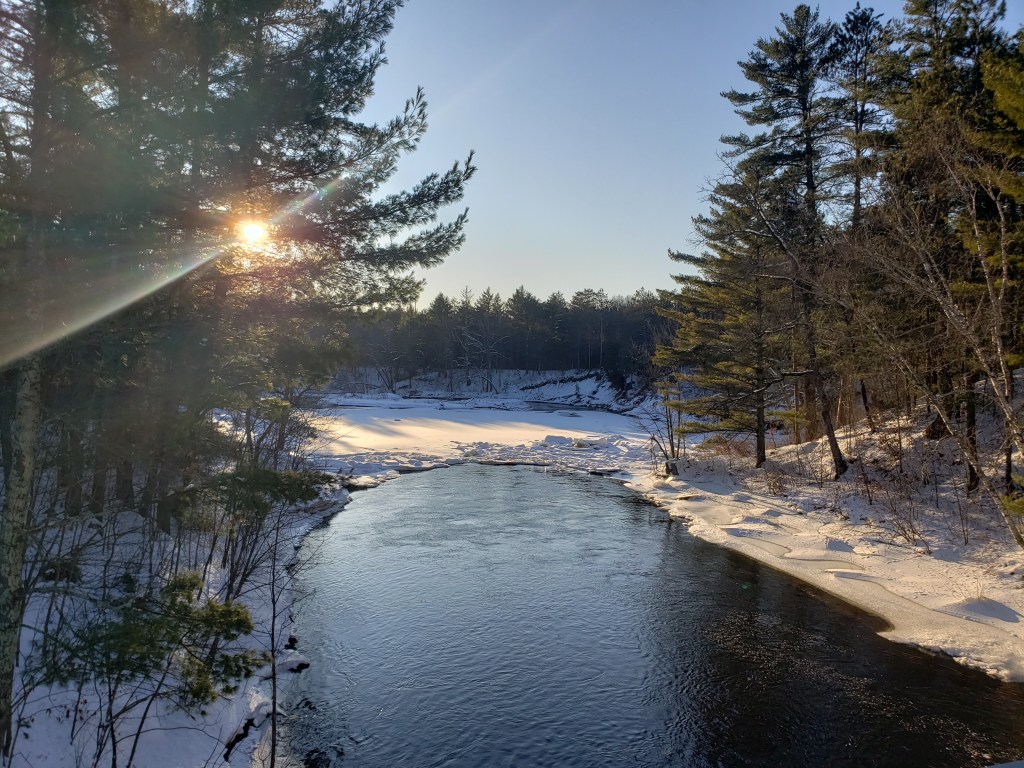
When was the last time you went camping? We all have this desire to spend time in nature and escape our artificial world. According to the annual North American Camping Report only 62% of Americans go camping at least once per year. Surprisingly, that is actually up 22% since 2014. Wisconsin offers an abundance of camping land all throughout the state. Camping is a very general term and you need to decide how you plan to camp and what rules you need to follow.

1.) Decide what type of camper you are

2.) Acquire fundamental camping gear

3.) Find a spot to can camp

4.) Read the rules associated with your camping category

5.) Go camping and continue to explore!

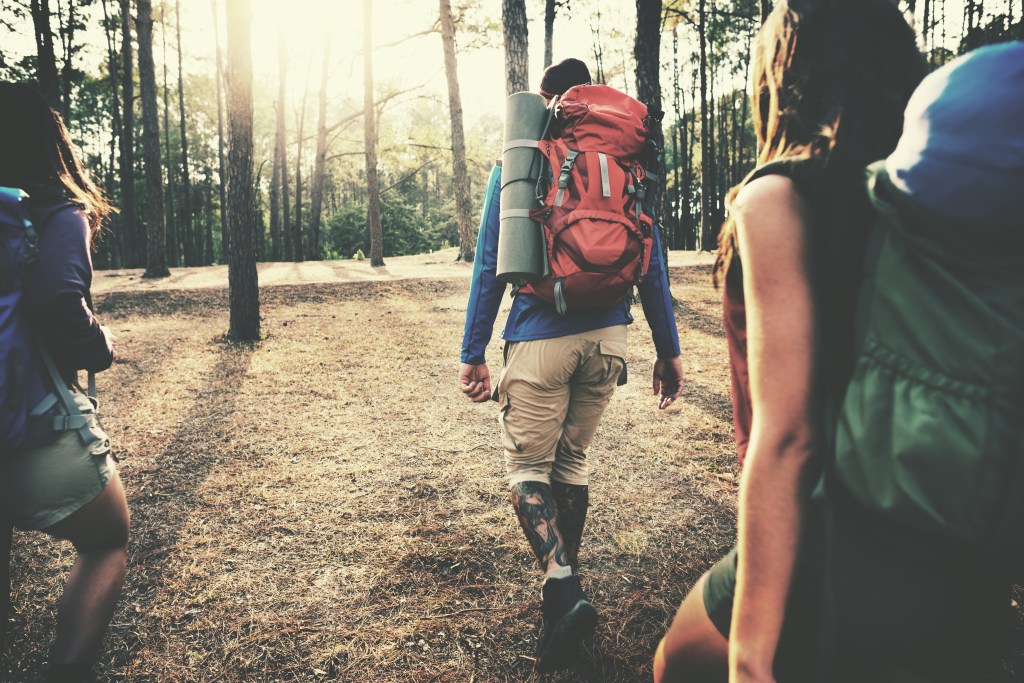
What is your style of camping? RV, tent, canoe, survival, “van down by the river”? (C. Farley) The first thing any new camper needs to do is decide what type of camping they want to participate in. Are you someone who wants to purchase a RV or towable camper? Do you want to use a tent, but remain within a campground? Would you prefer backpacking to a remote location and making your own campsite? There are many variations people take when determining how they like to go camping.

It’s important to be aware of the category of camping you fall into because not all camping land and rules are the same. The rules and land opportunity vary depending on the location you go to and who is managing the property. There is pros and cons to each style.

(Shutterstock)

Once you decide on a camping style, you’ll need to invest in fundamental gear. To get started, not much is needed! You can always add to your inventory.

Richard from Outside Pursuits says, “Not only is it important to have the right gear, but you will want to make sure it has been carefully selected. Gear that doesn’t hold up to the abuse you’ll give it will only lead to an unpleasant experience.”

If you plan to buy an RV, you’ll need to spend some time learning about the options available. Understanding the pros and cons of each model is critical. RV’s require maintenance and can have limitations to their size. One thing to keep in mind is where you plan to take the RV. If you are going deep into the woods, what happens if you get stuck on a narrow road?

Many choose to stay a little more minimal and prefer a tent. Even with a tent, you’ll have your options cut out for you. Primarily, how many people can sleep in the tent. Often beginners want the biggest tent they can get for the most reasonable price. However, a large tent quickly adds weight to what you’ll be carrying.

An attractive category of camping is “primitive camping”. These individuals hike out to a location of their choosing and carry all their gear. Primitive campers tend to invest in small, uniquely engineered gear, such as: cookware, sleeping bags/pads, etc. An important thing to consider is a GPS. Cell signal can be limited in the woods. Landowners often require primitive campers to be at least one-hundred yards from any trail or parking lot. Even at such close distances, it is easy for someone to get lost. Accidents happen when in the woods, being able to get to safety is essential. Especially at night, navigating the woods in the dark can be very difficult even with a flashlight.

When selecting your fundamental gear, consider your shelter type, food preparation, sleeping arrangements, flashlights, and any other gear necessary for your category of camping.

Choosing a camping location can be exciting! The best place to start is by going to the Wisconsin DNR website. They offer a list of campgrounds and state land that allow camping. The DNR website also discusses general regulations and reservation guidelines.

Narrow down camping land that meets your needs. If you’re using an RV, you’ll be looking for campgrounds with designated sites. Or perhaps state land with various RV sites cleared throughout the property. Often state land that offers hunting has a limited amount of remote RV sites and they can be great sites. Keep in mind, RV’s often require some sort of waste disposal and water hookup station.

Primitive campers might struggle to find ideal locations, often needing to find specific land that allows this activity. Many landowners will designate a specific area to this type of camping and provide trails through out that land. Checking the website associated with that land will provide a lot of vital information such as: trail guides, firewood policies, vehicle parking, etc.

This is a list of backpacking land from the DNR:

Property nameBackpack (walk-to) sitesHiking trail miles at property
Amnicon Falls State Park2 (about 100 to 150 feet from the parking area)3
Big Bay State Park7 (about 100 to 400 feet from the parking area)9
Big Foot Beach State Park376
Blue Mound State Forest1225
Brule River State Forest840
Buckhorn State Park467
Copper Falls State Park117
Chippewa Moraine State Recreation Area310
Elroy-Sparta State Trail1132
Governor Earl Peshtigo River State Forest112
Governor Dodge State Park2428
Governor Knowles State Forest938
Kettle Moraine State Forest – Northern Unit6 backpack shelters (5 along Ice Age Trail); 14 campsites83
Kettle Moraine State Forest – Southern Unit*3 backpack shelters along Ice Age Trail; 11 campsites127
Lapham Peak Unit Kettle Moraine State Forest126
Merrick State Park123
Mirror Lake State Park1319
Nelson Dewey State Park42
New Glarus Woods State Park148
Newport State Park1730
Northern Highland-American Legion State Forest4769
Pattison State Park37
Pike Lake Unit Kettle Moraine State Forest38
Point Beach State Forest117
Rock Island State Park4010
Straight Lake State Park109
Wildcat Mountain State Park205
Willow River State Park417
Yellowstone Lake State Park1612
(Wisconsin DNR)

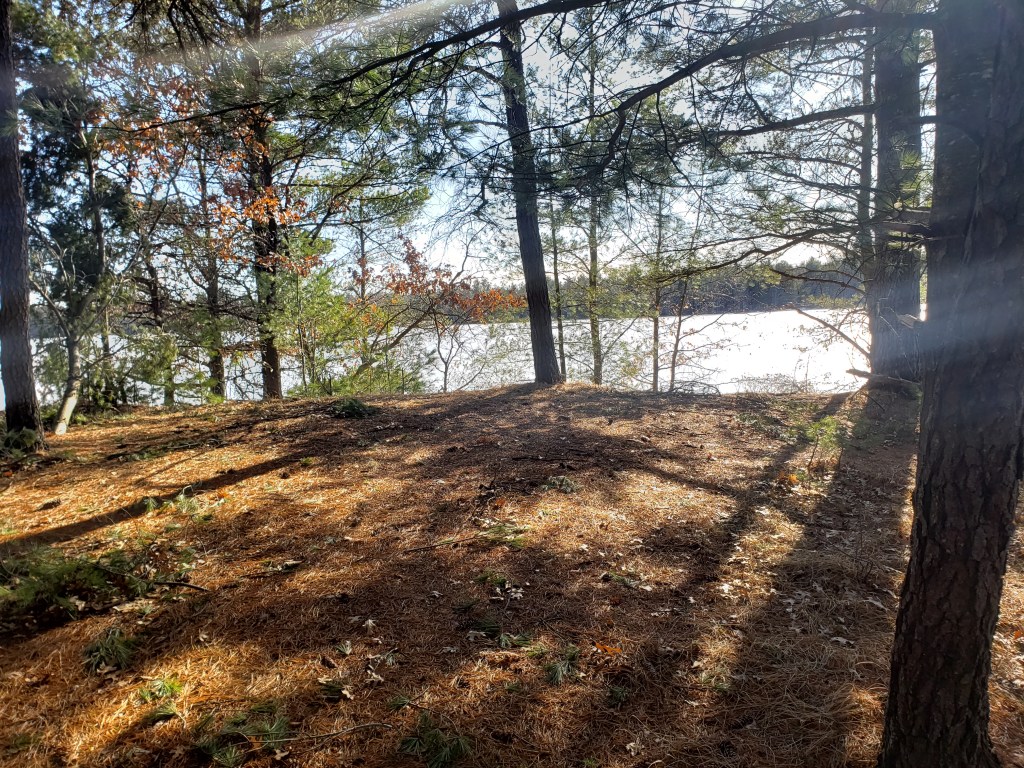
I have one last piece of advice on choosing your camping location. Before you pack up all your gear, take time off work, and drive to your location, do a test drive. Go to potential camping land and check it out to see if it meets what you’re looking for. Often employees of the land can be found at a headquarters or in a green truck and provide awesome support. 

That leads into the next step in getting start with camping, learning the rules. The Wisconsin DNR website offers a broad overview of the rules you need to follow. However, essential rules vary from land to land. These rules are not something to quickly glance at because they can have serious impacts on your trip. Failing to know the rules may lead to an unsatisfied trip due to preparation needs or result in a large fine on your windshield in the morning.

Fire tends to be something that is overlooked. People plan their food arrangements to be cooked over a fire and pack a lighter. However, firewood policies vary all over! Anticipating a campground to sell firewood is not always a safe bet. Once arriving to see no firewood for sale, you might resort to cutting down trees. This is almost always against the rules in campgrounds. To their credit, if everyone was cutting down trees for firewood, the camp sites would become a field and unenjoyable to others. Expect to see a ticket in the mail if you break this rule as campground workers check the site once you leave.  

Almost all campsites require some sort of daily or annual pass to be on the land. Usually they’re reasonably priced and annual passes are much cheaper than expected. Some sites have self-registration stands that only take cash. Keep in mind your payment is essential to maintain the beautiful land you’re occupying and not an optional donation. Many self-registration stands have a camera along the road to record traffic in the park. They’ll make sure your license plate matches a one written on a registration form.

You’re now ready to go camping! Getting started takes a little bit of research and preparation but offers a lifetime of enjoyment. Exploring new campgrounds and finding the best spot is very exciting! Google Earth can be a great tool to get an idea of the camp environment.

Eau Claire State Forest

Eau Claire State Forest has over 52,000 acres of land with seven campgrounds. Remote camping in the forest is also allowed. There are plenty of rivers throughout the property and hunting is allowed for those who are interested. Property management maintains 183 miles of snowmobile trails, 30 miles of ATV trails, as well as mountain biking and cross-country skiing trials. For more information, Eau Claire has a very informative website.

Black River State Forest

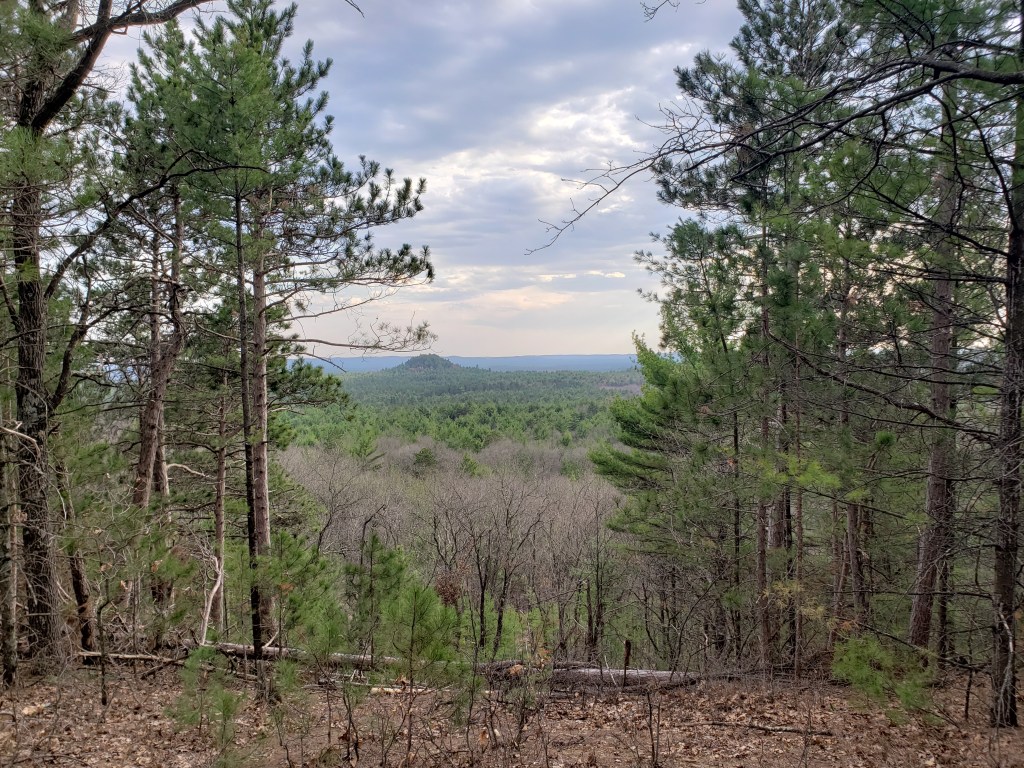
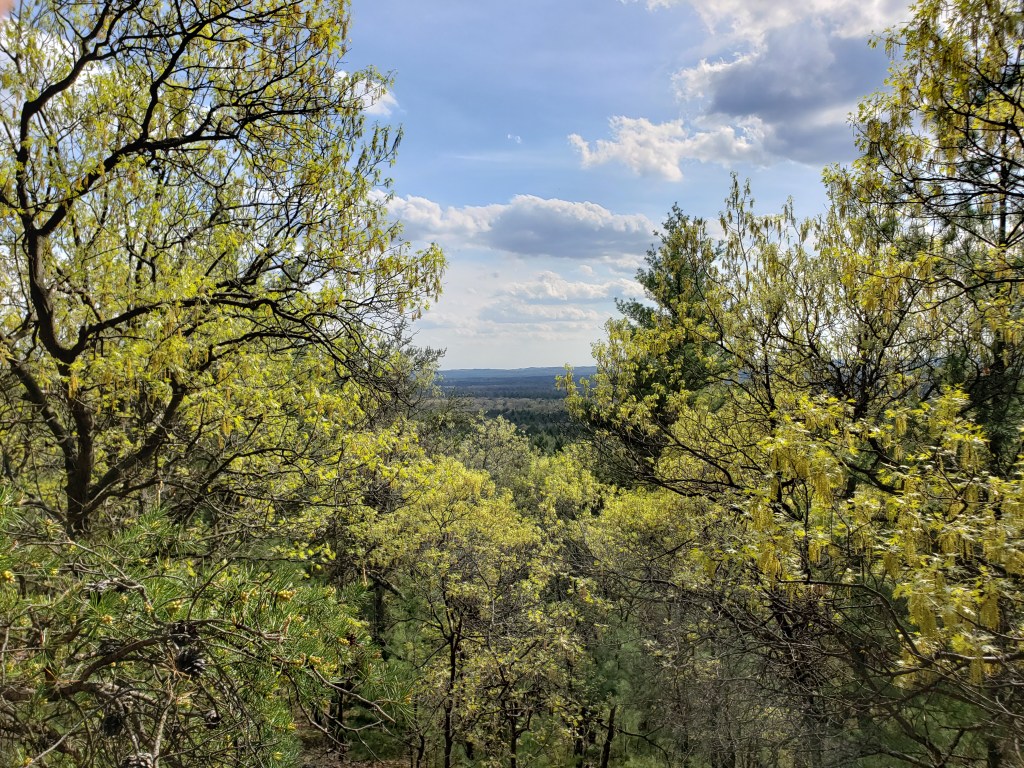
Black River State Forest is a very well-maintained property with modern, rustic, and primitive or remote campsites. The land occupies 68,000 acres. Travel Wisconsin says, “Scenic overlooks on their peaks, you can look to the northeast where 10,000 years ago the bottled-up glacial meltwater of Lake Wisconsin once covered 1,800 square miles.” Black River is great for primitive campers. They have a large region designated for this camping style and it has 27 miles of hiking trials throughout the area. Check out Black River‘s website for more information.

References:

Remick, Richard. “How To Choose Gear For Your Camping Trip.” Outside Pursuits, Outside Pursuits, 25 Sept. 2019, http://www.outsidepursuits.com/choosing-camping-gear/.

Group, Cairn Consulting. “2019 North American Camping Report by KOA.” North American Camping Report, Kampgrounds of America, 24 Apr. 2019, http://www.rvda.org/RVDA/Media/News_Releases/NewsReleases19/May/2019_North_American_Camping_Report_by_KOA.aspx.

Resource Center, Agriculture and. “EAU CLAIRE COUNTY OPERATIONS.” Parks & Forest | Eau Claire County, Granicus, 12 Mar. 2020, http://www.co.eau-claire.wi.us/departments/departments-l-z/parks-forest.

“Black River State Forest: Travel Wisconsin.” TravelWisconsin, Wisconsin Department of Tourism, 1 Jan. 1999, http://www.travelwisconsin.com/state-parks-forests/black-river-state-forest-204183.

“Wisconsin State Park System Camping in Wisconsin State Park and Forests.” Camping in State Parks and Forests – Wisconsin DNR, Wisconsin Department of Natural Resources, 24 Mar. 2020, dnr.wi.gov/topic/parks/camping/.

Simonowicz, Nina. “Things To Do on the North Shore, A Mile by Mile Guide.” North Shore Visitor, Jan. 2020, northshorevisitor.com/attractions/mile-by-mile/.

McCarthy, Beth and Tom Schiller, directors. Saturday Night Live: The Best of Chris FarleyThe Best of Chris Farley, Saturday Night Live, 5 Apr. 2000, https://www.imdb.com/title/tt0500100/.

How to build a PC

Have you ever thought of how computers work? Maybe how they’re put together? Today I’m going to talk about how to build a PC. It wont be from scratch, but it will be assembling the parts. But first, lets start out with why you should build your own PC. I believe I have knowledge in this field because I have researched into this topic pretty deep, and I have built my own.

Why build a PC?


So why would you want to build a PC? From a company standpoint building your own PC for intensive programs would make them run faster and more efficient. For example, if you own a modeling company. By making your own PC you could run that same program faster and more efficiently, which can save lots of time. The same can apply to coding/compiling. Sometimes even on the strongest PCs completing a build (compiling everything in a program) can take hours and even days. So as a company its very useful to cut that time.

Building a PC can have many advantages compared to buying a pre-built build. One advantage is that you can pick and choose what stats your PC has. This can range from any part that the PC uses. When buying a pre-build, they also make it hard to upgrade/customize it, meaning when you try to replace a part it the company that made it may have tightly locked it down under some screws so it looks nicer. Its also better quality for the price.

Parts and function


Parts and function for a PC can be confusing, so Ill talk over the main components for a basic PC.

CPU (Central Processing Unit): The CPU is the brain of the computer. It takes instructions from the RAM, decodes it and executes the instructions.  The instructions can be basic math, comparing numbers to other numbers, or just moving them around. (Since everything with computing is math related). The CPU can also use the other parts of the system to complete its process, like store it in your storage on your computer. The speed of a CPU is also amazing. Speed for CPUs are measured in gigahertz(GHz). And each GHz is equal to two billion cycles per second. So a CPU with 2.3 GHz can carry out 2.3 billion calculations per second.

What is the Intel Comet Lake release date? 10th Gen CPUs rumoured ...
Intel CPU


RAM (Random Access Memory): RAM is one of the most important components to any device. Without it, doing basically anything on a system would be extremely slow. You can think of it as a devices short term memory. It temporarily stores (remembers) everything that runs on your pc, like all the services, your browser, or the game you’re playing.  You don’t want your CPU looking through your storage every time you open a new browser tab. That’s why we need this short term memory to store it so we can access it extremely fast.

How to Diagnose, Check, and Test for Bad Memory
Two RAM Sticks


There are different types of RAM, but we don’t need to get into that too much. We just need to know the generations for now. So RAM comes in different types, like DDR4, DDR3, or DDR2. This may seem confusing, but its just the generations of ram. New systems use DDR4 RAM, and older systems can use DDR2 RAM. The number simply means how much faster it is, so the higher the number the fast the RAM. They also have physical differences, so they’re not interchangeable. This also limits what RAM you can have in a motherboard.

Storage (Hard disk drive/solid state drive): Storage is very important on a computer, so you can.. store things. But there are different types of storage. Ill start off by explaining a hard disk drive. A hard disk drive (HDD) is your basic storage unit for a computer. You can think of it like a record player, but reverse. It stores things by moving an arm over a spinning disk, using magnetic storage to store and retrieve data. This is a very safe way to store a LOT of data. Since it has a moving part, it must be screwed down or shaking could make it malfunction.

Seagate launches first laptop HHD -- blames Vista drivers for poor ...
Hard Disk Drive


Next, we can talk about solid state drives(SSD). An SSD is also a storage unit but is many times faster than a HHD because this stores data directly and doesn’t using a spinning disk. It uses chips to store data. By doing it this way its even safer than using a large spinning disk. The only problem is, its way more expensive for an SSD. Its also smaller and does not need to be screwed down.

SanDisk 500GB 3D SATA III 2.5" Internal
Solid State Drive


GPU(Graphics Processing Unit): a GPU is basically a CPU, it performs complex math and geometric calculations, except the calculations are only  for graphics rendering. That’s pretty much it.

Nvidia GPU


PSU(Power Supply):  A power supply is, you guessed it, a power supply. This is a unit that converts AC(Alternating Current) into low voltage DC(direct current) for the components of the computer.  There are different types of PSUs, and the only difference really is the amount of voltage.

Amazon.com: Corsair SF Series, SF600, 600 Watt, Fully Modular ...
Power Supply


MOBO(Motherboard): A mother board is basically the “plug ins” for the other parts.  The motherboard doesn’t perform any calculations, it just simply organizes them and its used as a “middleman” between all the parts. Some MOBOs are newer than others, resulting in more functionality and compatibility, which I will explain later.

Motherboard

Picking the parts

So how do you determine which parts to pick? Sadly its not as easy as “I want this and that and this”. Each part must be compatible to other parts. For example, you need the correct chipset if you want to use this CPU with this MOBO, and you need DDR3 ram for this MOBO and not DDR4.  Luckily, there are websites that you can use to pick your parts. For example, pcpartpicker.com is a great website because it has you pick each part individually, while keeping track of if its compatible or not. In the end, the part you chose can either be based off your budget, or how strong you want your machine to be. For a low end PC you would be looking at about 500-800 dollars, while the medium end would be 800—1,300, and for the upper end its 1,500+.

Which part should I get you ask? Well, that’s up to you and what you want. There are a lot of good parts for the cost, and that will have to involve some reading and research on the parts. At the time this was written, AMD CPU’s are very good because they’re cheap and high quality. You can use userbenchmark.com to compare parts, and you can even use it to compare a build to another build.

Comparing to pre-builds

To show you that making your own is better, I put together a system and we will compare it to a pre-built of the same price.

Our system:
CPU: AMD Ryzen 6 3600x 3.8 GHz 6-Core Processor
GPU: NVIDIA GeForce RTX 2060 SUPER 8 GB
RAM: G.Skill Trident Z Neo 16 GB (2 x 8 GB) DDR4-3600
Motherboard: Asus ROG STRIX B450-F GAMING ATX AM4
PSU: Corsair CXM 550 W 80+ Bronze Certified Semi-modular ATX
Storage: 1 TB Samsung HHD

These parts added up cost about $985, but we still need to add a case, and an operating system. When these are added that brings our total to about $1,100. The reason I’m not going to talk about the other parts is because those parts do not contribute to the stats of the PC.

We will be comparing it to an Alienware Aurora R8

There system:
CPU: Intel i5 9400 6-Core 2.9GHz
GPU: NVIDIA GeForce GTX 1660 Ti 6 GB
RAM: 16 GB Dual Channel DDR4-2666
Motherboard: Not listed
PSU: Not listed
Storage: 512 GB SSD

Lets start the comparison. I will use userbenchmark.com to do the comparing. Our CPU is about 10% better, because it has a higher GHz processing speed. Our GPU is about 30% better because there GPU is part of the GTX series, and our GPU is part of the RTX series, which is a new and better version. For the RAM, they didn’t list the brand, but we can compare the speed of the ram, and see that ours is faster. They also didn’t list the motherboard or the PSU, but that’s not needed for the comparison. For storage, our 1TB HHD costs less than there 512GB SSD, and we can put more things on it. Sure an SSD is better than a HHD, but if it is your only storage unit it will get filled up quickly and SSDs are mainly used for specific programs or important data.

So after the comparison, we can see that we have a better system just by assembling it for ourselves.

How to assemble the parts

So now it’s the big finale, how to put it all together. You might think that its going to be scary, but its basically playing very expensive Legos.

For prep, make sure to set your case and parts on a hard surface, like a desk or table. Now take your socks off, and make sure you’re doing this on a hard floor, basically not carpet. Why? Static electricity will ruin some of the parts, you can also take a precaution by getting an anti-static electricity band.

When you receive your motherboard, there will be a manual in there. The manual explains where to plug things into, and what plugin goes to what pins. Since every motherboard is a little different, it’s hard to tell you how to do this exactly. The process may be a bit different for you, but here are some steps to help you.

For installing the CPU, go ahead and take it out of the box, along with the cooler. Don’t touch the “gray” paste on the bottom of the cooler, because that will be used to contact the CPU, or the bottom part of the CPU(the side that isn’t smooth). Next, slide the CPU into socket. There is a little triangle on the CPU and the socket, make sure to line those up and then put it in. After that, put the lever back in place and we can move to the cooler. For the cooler, simply put it on top of the CPU, and click it into the motherboard. Next, take a look at your motherboard manual and figure out where to plug the cooler in.

CPU going into its socket

Next lets move on to RAM. There will be a 4 slot section on the motherboard, and this is for RAM. Around the area there will be some text that says the correct way to install them. For RAM you do alternating sticks, so if you have 2 sticks, you should use the 2nd and 4th slot. Simply take your RAM stick, and place it into the socket, and push down until you hear a click.

RAM and its sockets

Next, you should take your motherboard and screw it into the case. If you did this already, no problem, but if you haven’t this is the time to do it. All you need to do is find the contact points on the motherboard and screw them to the inside of your case.

Next, lets install the PSU. Simply slide the PSU into the case at the back, and line it up and then screw it in. Once that is done, consult your manual to find what pins the cable plugs into.

Installing the PSU

Next, we can install the storage drives. If you have a hard drive, find the spot in the case that looks like the drive could slide into. Once you have done that, screw in the drive with some small screws and then connect a data cable and a SATA cable to it, and look at the manual to see where those connect to. The SATA cable usually has a “SATA1” or “SATA2” plug-in on the motherboard so you can just look for that.

Finally, we can hook up the GPU. To do this, take your GPU and find the corresponding slot and plug it in. Then, connect the PCI-E cable to the GPU, and then plug in the power cable which your manual will tell you about.

Installing the GPU

By this time, your PC is up and running, but you still need to install drivers and such. To do so, simply look up a video on how to do that because it can vary based on the operating system and GPU. If you were building along, and you pressed the power button, and nothing happened. You probably did something wrong. All motherboards come with a tiny speaker that you can plug into them, so if you did something wrong, there will be a beeping sequence for what mistake you have made. Just simply look up the beep code that was played to you, and websites will tell you what is wrong and how to fix them.

By this time, everything should be complete and your PC should be running smoothly. Building a PC is very intimidating, but once you understand the process and learn a little bit of things about the system, its pretty basic. I hope this guide helped you or at least answered some questions you have about PC building.

Edited by: Steele, Marissa

Sources:
https://www.youtube.com/watch?v=OZaFqY8UF6I

https://www.dell.com/en-us/shop/desktop-computers/alienware-aurora-r8-gaming-desktop/spd/alienware-aurora-r8-desktop/dpcwscr802hv2?gacd=9614064-1012-5761040-0-0&dgc=st&&gclid=CjwKCAjwpqv0BRABEiwA-TySwU1GehJnBTRHrfj9cdgTd90aehRKV4tTYtTsMUbaz4hedpMMEO69JhoCc3sQAvD_BwE&gclsrc=aw.ds

How To Bake an Apple Pie

By: Marissa Steele

The importance of baking is the way that it brings people together. Baking could be used for quality bonding time or to bring to some sort of a gathering to share. My grandpa taught my family and I how to make this pie. It is how we spend most of our time with him, he teaches us how to make all sorts of baked goods. Baking can also help you grow as a person, it teaches you how to carefully follow directions. Recipes can be very precise in the way that you add some ingredients together in a certain order. There are also specific tools that work more effectively that will be shown in the recipe. This article will go in depth about everything you need to know as a beginner while baking an apple pie.

Some basic materials that you will need to complete this task is an oven, a pie pan, mixing bowls, apples, a rolling pin, a blending fork, and pie ingredients. When you are choosing your pie pan it is important to know the differences between a metal and glass pie pan. Metal is the better heat conductor. It has the right amount of thickness not only to heat and brown quickly but also to cool off quickly once the pastry is perfectly golden brown. Glass, on the other hand takes time to heat even in a 400-degree oven. It also takes longer to cool down after you take it out of the oven so you risk burning the crust. I used a glass pie pan for this pie and found that it took longer for the crust to cook, the recipe said 45 minutes but I ended up cooking it for about 55 minutes to get the crust crispy and golden brown. The most crucial ingredient in an apple pie is an apple of course. There is a science to finding good baking apples. They recommend that you use firm apples, they could be firm and sweet or firm and tart, it is up to your preference. Braeburn, honeycrisp, pink lady, and granny smith apples are among the best. There are also gala, granny smith, and fuji. You can choose among any of these apples and will be more than satisfied with the way your apple pie turns out!

Any good pie starts with a solid crust. The kind of crust I made today was called a butter crust. It is made from scratch which takes some time and muscle but will pay off in the end result of the pie. This crust consists simply of butter, flour, salt, sugar, and water. You first cut the butter into half-inch cubes and add it to your dry ingredients. The tricky part about making this crust is the technique of “cutting” the butter into the flour. To do this, you just take your fork to the butter, flour, salt, and sugar in a bowl and press the dry ingredients into the butter. Your arm may get a little sore as you will be mixing for some time, but continue to do this process until the pieces look like small peas. Then, you will slowly add six tablespoons of water, one tablespoon at a time, into the dry butter mixture by still using the same cutting technique, pressing it all together with the fork. Once you have it evenly mixed you will roll it into two even balls with your hands and stick them into the fridge to cool.

Now that you have your crust cooling in the refrigerator, you can begin putting the filling of the pie together. You will wash 5-6 large baking apples of your choice; I am using pink lady apples. The apples need to be peeled and have the cores removed. To do this step, we have this slick device called the apple machine. This will peel, slice, and de-core your apple all at the same time.

Once you have all of your apples peeled, transfer them to a cutting board. You will start by cutting your apple in half, then quarters, then cut each of the quarters in half again. This will give you the perfect bite-sized apple pieces for inside your pie. See images below for clarification.

Take four or more cups of your apple pieces and put them into a large mixing bowl. Next, we will be seasoning the apples. You will need brown sugar, flour, cinnamon, nutmeg, salt, and a little lemon juice. I know you must be thinking that is a lot of dry ingredients, how will that all get mixed in evenly? Well, the apples have some of their own juice in the bowl which will help balance out the wet and dry ingredients to get make sure all the apple pieces get coated evenly. First, you will want to mix only the brown sugar, flour, cinnamon, nutmeg and salt together in a separate bowl, then add that mixture to the apples. Once it is evenly mixed, add the lemon juice and mix again. Your mixture is then complete and should look something like this.

Next, we need to get the balls of dough out of the fridge that were made earlier to roll out into a crust. There are a few tricks to doing this successfully. First, find a clean counter top and spread a thin layer of flour on that surface. Place the ball of dough on the flour, get a large rolling pin and also cover the rolling pin in a thin layer of flour. This will keep the dough from sticking to the counter and also from sticking to the rolling pin. Then begin to roll out the ball of dough into as close of a circle as you can make it.

When rolling the dough, don’t use too much pressure as that will make the edges of the dough crack severely. You won’t get your crust rolled out perfectly into the shape of a circle without any cracks along the edge, but this will reduce the severity of the cracks. Roll the dough in all directions to get as close to a circle as possible and continue to do so until the crust fits the pan and is about 1/8th of an inch thick. Roll out the other ball of dough following these same steps.

Then transfer one of the rolled-out crusts into the pie pan and add the apple filling. Spread it evenly to fill in all the empty spaces. Place four ¼ inch butter slices to the top of the mixture. Finally, to top of the pie, we are going to make a lattice pie crust using the other rolled out crust. This process is tricky to get a hold of, but once you understand the pattern it is easy to catch on. Using the other rolled out cruse, take a pizza cutter to cut about one-inch strips into the dough parallel to one another. Then follow the steps below to see the pattern.

1.)  Lay out 4 to 7 parallel strips of the pie dough, depending on how thick your strips are, on top of the filling, with about 1/2-inch to 3/4-inch space between them. Fold back every other strip.

2.) Place one long strip of dough perpendicular to the parallel strips as shown. Unfold the folded strips over the perpendicular strip.

3.) Now take the parallel strips that are running underneath the perpendicular strip and fold them back over the perpendicular strip, as shown. Lay down a second perpendicular strip of dough next to the first strip, with some space between the strips. Unfold the folded parallel strips over the second strip and continue this process until the weave is complete over the top of the pie.

Now for some finishing touches, we will want to trim the edge of the pie. I just trimmed right around the edge of the pan with a knife and didn’t bother pinching the edge. Then moisten the upper crust with some water by just wetting your hands and patting the water on top, it doesn’t have to be too wet. Use just enough water so that when you sprinkle the top with sugar, it sticks. Be careful not to add too much sugar as it will burn. Then bake in your oven at 400 degrees for 45 minutes or until the crust is crispy and golden brown!

A few extra tips are to place your pie on a cookie sheet in case any of the filling boils over while cooking, then you won’t have a mess to clean up in the bottom of your oven. Also, wrap the edge of the pie in tin foil to keep the edges from burning. Finally, after all that hard work you successfully baked a delicious pie. Baking is a great way to spend your time and accomplish something in a day. I usually am not the best baker so if I can successfully make this recipe, you can to!

Sources:

https://www.simplyrecipes.com/recipes/how_to_make_a_lattice_top_for_a_pie_crust/

https://www.bonappetit.com/test-kitchen/cooking-tips/article/the-3-best-apples-to-use-for-baking

https://www.chicagotribune.com/news/ct-xpm-1991-07-18-9103200715-story.html

Introduction To 40K Miniature Painting

By Lucas Schaff

A selection of Chaos Marines

In the grim darkness of the far future, there is only war.

    Warhammer 40k is a tabletop game created by Games Workshop. Since the publishing of its first rulebook in 1987, 40k has grown to be one of the most popular tabletop games of all time, spanning countless novels, video games, and even an upcoming TV series. Core to all this, however, are miniatures. The game started as a way to battle your Dungeons and Dragons miniatures with other players, and the minis continue to be the focus of 40k. The hobby of collecting, painting, and eventually fielding your own miniature army on the tabletop is one of the most satisfying ways to spend your time.

    The first decision you have to make is what faction you want to play. Do you prefer the space marines, the superhuman defenders of humanity? Or perhaps you would rather play the tyranids, a hive mind alien race set on consuming all life in the universe. Each faction plays a little differently in the tabletop game, but I recommend picking one based on what looks cool to you. If you’re not sure what faction you want to play but still want to get a taste of painting, there are a few starter kits that are relatively inexpensive and are a great way to get your feet wet without a massive investment.

    Once you have your models picked out, the next step is to get paints. The paints you choose are going to depend on the faction you choose, along with your own personal preference. Each model comes with a recommended paint scheme, but it’s ultimately up to you to choose your colors. Usually the paint scheme uses Games Workshop’s proprietary Citadel Paint brand, but there are ways to convert to other brands so you can get the same results (https://www.dakkadakka.com/wiki/en/Paint_Range_Compatibility_Chart). You’ll also need a set of fine paint brushes, as well as some plastic glue (the kind you find at any model shop). Once you have all that, you’re set to start painting!

    The first step is to assemble your miniatures. Most Games Workshop minis fit together very easily, just requiring a drop or two of glue at the points of contact. Make sure to check the instruction manual before you glue anything, because the glue actually “melts” the two pieces of plastic together, meaning you won’t be able to separate them once the glue sets.

Fully assembled skitarii ranger.

    Whenever painting, it’s a good idea to thin your paints with a little water, and apply the paint in two thin coats. This makes the paint easier to manipulate when painting, and helps create a more consistent finish. How much you thin your paint depends on what you’re painting, and experience is the best way to figure out how much you need to thin. Everyone creates a melting space marine on their first go around. Be sure to also use a palette. This allows you to control how much paint is actually on your brush.

    After the mini is all assembled and the glue is set, the next step is to apply an undercoat. The undercoat is the base color of your model, and is generally what the primary color of the finished model is. Sometimes it’s useful to start with black or some other color, but it really all depends on what you want the finished product to look like. Whenever painting, it’s a good idea to thin your paints with a little water, and apply the paint in two thin coats. This makes the paint easier to manipulate when painting, and helps create a more consistent finish. How much you thin your paint depends on what you’re painting, and experience is the best way to figure out how much you need to thin.

Black undercoat applied

    After the undercoat is applied, you can start basecoating. This means applying color to large parts of the model, laying a base for future detailing. In this step you might want to paint any weapons or armor pieces that are a different color to your undercoat

    Once most of the color is on to your mini, you can start to detail. Apply the finishing touches by painting eyes, metal accents on armor, or even freehand some insignias or other details. This is the last step, so take your time getting everything looking exactly how you want it to. You can also take this time to touch up any mistakes you made.

Detailing is completed

    Reading a guide can only help so much, and there are many techniques that you can use to make an awesome mini not covered here, so make sure to seek out other resources. The 40k community has hundreds of fantastic resources, and pretty much every mini ever released has a few stunning examples to get inspiration from. Make sure to seek out some of these resources for great tips and tricks to make your minis turn out awesome.

If your first model doesn’t turn out great, don’t sweat it. Everyone painted a space marine that looks like he’s melting their first time. Like anything, it takes time to learn, and reading guides can only help you so much. The best way to learn mini painting is to actually do it. One of the most satisfying aspects of the hobby is taking a look back on your old models and realizing how far you’ve come.

The newly painted mini with a couple other rangers

How To: Find the Big Dipper

Have you been looking for new ways to pass time during this quarantine period? I know I have, and here is a simple way to do just that. The Big Dipper is the most known asterism, a group of stars that form a pattern yet are smaller than constellations. The Big Dipper is part of the constellation Ursa Major, or the Great Bear, and it is called the Big Dipper because it looks like a ladle and is bigger than the second set of stars that resemble an almost identical image, the Little Dipper (Rao). Given proper conditions, if you imitate these following steps you can find the Big Dipper in just a few seconds but can enjoy them for hours.

This group of stars that have been marveled for centuries aren’t just to look at. The Big Dipper has also been used to both tell time and to help with navigation. African American slaves took advantage of this and used the Big Dipper to direct them to the North on the Underground Railroad (Person). Ancient cultures used the set of stars to tell time and determine the seasons as well.

Materials

Clear starry night- A clear starry night is the easiest conditions to find the asterism. (When north of 41° North you are able to see the Big Dipper at any point throughout the day (Byrd).)

Area with minimal light- Having light around you will make it harder to spot the stars.

Steps/Sequence

1. Going out at the right time- When looking for the Big Dipper, the best time of the year is between March and June, while 10 p.m. is about the best time of night to see it (Person).

Good stargazing weather (CBS)

2. Finding the right spot- Begin by finding a spot where there isn’t any bright lighting, and where the northern horizon is visible and clear (Person).

Ideal conditions for stargazing (Travel Wisconsin)

3. Look north- Figure out which direction is north and then slant your head backwards about 60 degrees. From midsummer to autumn you will not have to tilt as far back because the Big Dipper is closer to the horizon (Person).

Looking at the Stars (Unsplash)

4. Find the Big Dipper- You are looking for a group of seven stars. Three of the stars make up the “handle” while the remaining four shape the “bowl”. If your having troubling locating it think of it as a kite instead and imagine the “handle” as the “string” and the “bowl” as the “kite” (Person).

The Big Dipper (wikiHow)

Taking it a step further (Telling Time)

1. Finding the North Star- Once you find the Big Dipper, you can find the North Star one of two ways. The first is to look for the brightest star because the North Star is the brightest star in the Ursa Minor constellation. The second is to look at the two stars that line up with one another at the end of the “bowl” of the Big Dipper and look directly straight off from that in the direction of the opening of the “bowl” (Person).

The North Star (wikiHow)

2. Telling time with the Big Dipper- The Big Dipper is circumpolar. In other words, it circles around the north celestial rather than rising and setting like the sun. As a result, the Big Dipper rotates in a counterclockwise direction around the North Star. It travels all the way around the North Star once every day. This allows people to use the Big Dipper to tell time. When the Big Dipper looks as if it is upside down and north the North Star it is midnight. When it looks as if the handle if upward and east of the North Star it is 6 a.m. When it appears to be positioned right side up and south of the North Star it is 12 p.m. Lastly, When the handle is pointed downwards and west of the North Star it is 6 p.m. (Person).

Telling time with the Big Dipper (wikiHow)

Now that you know how to, sometime during this quarantine period, go out one night and see how fast you can find the Big Dipper. Then, without looking at the time, challenge yourself to see if you can tell roughly what time it is. Finally, sit down, lay back, and enjoy the beautiful starry night sky!

The Big Dipper (Flickr)

References

Byrd, D. (2017, October 3). Can you find the Big Dipper? Retrieved April 3, 2020, from https://earthsky.org/tonight/where-is-the-big-dipper-on-these-octber-evenings

Person, & wikiHow. (2019, December 8). How to Find the Big Dipper. Retrieved April 3, 2020, from https://www.wikihow.com/Find-the-Big-Dipper

Rao, J. (2006, May 12). The Big Dipper and the Cross. Retrieved April 3, 2020, from https://www.space.com/2400-big-dipper-cross.html

How to Make Dutch Oven Bread.

Written by —-
Edited by —-

In this crazy time of being locked inside our houses for weeks on end I needed to learn a new skill. I decided to learn how to bake my own bread, and wanted to share my new skill with all of you. I wasn’t sure where to start, but luckily I am living with my older sister who happens to be home from working in the French Alps as a chef! I asked her to teach me how to make lovely Dutch oven bread. I thought this process would be very difficult but it was so much easier than I imagined, and I hope you enjoy this recipe.

Ingredients:

All purpose flour -3 cups (plus more for dusting)
Yeast (instant active)- Half teaspoon
Salt- 2 teaspoons
Warm water- 1 and a half cups
Sugar- Half teaspoon
Olive oil- 2 tablespoons

Ingredients

What you’ll need:

Large mixing bowl
Medium mixing bowl
Measuring cups
Measuring spoons
4-quart Dutch oven
Plastic Wrap
Parchment Paper
(Optional) Thermometer

What you’ll need

Steps:

First, mix two cups of flour with salt in a large mixing bowl. Leave one cup of flour to the side.

In your medium mixing bowl, mix water warm water with sugar. You want this water to be about 100 degrees, which is where a thermometer would come in handy. Be careful the water is not hotter than 115 degrees or you will kill your yeast. Mix warm water with sugar before putting yeast in until its dissolved because yeast feeds on sugar.

Next add your yeast, making sure that it all makes contact with the water. Let this sit for 10 minutes.

When your yeast is in the sugar water you will be able to tell if this process is working if the yeast is forming a brownish foam on the surface. This foam will continue to achieve more and more foam the longer it sits. This mixture will also have a strong yeasty smell (like pizza dough). If you don’t have foam on the surface you probably have dead yeast and you will want to try this step again. DO NOT move forward until you are happy with your yeast results!

Yeast mixture.

After the 10 minutes, mix your foamy yeast into the salt and flour ratio. The reason we only have two cups of flour used so far is to have a more even ratio for the autolyse process. Autolyse is when the ratio of water to flour is higher to encourage gluten development. Mix this thoroughly until all the flour is combined. Your dough should be stringy when you pull your spoon out, this mixture will probably be more liquid than you would expect dough to be.

Autolyse Process

Cover this mixture tightly with plastic wrap, and then cover with a kitchen towel and place the bowl in a warm place for 30 minutes. We used our oven when it was turned off (Just make sure you don’t accidentally turn your oven on during this time!)

 During this time you have the option to eat ravioli (or at least, that’s what we did.)

After the 30 minutes you should see a slight rise, and some bubbles on the surface. Unwrap the plastic wrap from the mixture and add your third cup of flour to this mixture (it is easier to mix by hand.) By now the dough should by sticky and more form able than before.

Sticky Dough Texture.

Next, rinse out your medium mixing bowl you used for your yeast, and add your two table spoons of olive oil to it.Take your thoroughly mixed dough and place it in the medium mixing bowl with the olive oil. Roll your ball of dough around until it is thoroughly coated on all sides. Cover with more plastic wrap and your kitchen towel and put the covered dough back into to the warm spot for an hour.

Covered Dough

After an hour its time to check on your dough! For this step you will be adding air to your dough to help it stay nice and fluffy. In your hands stretch the dough out slightly and then fold it back into itself without pressing the air out.

Repeat this process a few times before placing the bowl back into the bowl and recovering with plastic and a towel and placing this into a warm area for another hour. You will want to repeat the step of stretching and waiting for an hour another 2 times.

Once dough has set, remove the dough from the bowl and place on a sheet of parchment paper dusted with flour. Lightly dust the entirety of the dough with flour and pull the sides of the dough out slightly and tuck them back under the dough. This should help shape the dough into a ball with a tight top. Repeat the pull and tuck process until the top of the dough is pulled taught and shaped nicely.

Dough Shape

Next place your dough back onto your dusted parchment paper and put some slits in the top. I only put three on mine but you can put more if you choose, or add a fun design. After you score the top cover again with plastic wrap and a towel for about 30 minutes, no need to put in a warm place. It only needs to rest about 30 mins.

Now is when you want to preheat your oven to 450 degrees Fahrenheit, while your oven is preheating place the Dutch oven (with the lid on) inside to allow it to heat up along with the temperature of the oven. Preheating at this point allows your dough to set for that needed 30 minutes.

Once your oven and Dutch oven have preheated quickly remove your dutch oven and place your parchment paper holding your dough inside, cover with the lid, and allow to cook for 1 hour, or until golden brown and cooked through.

Dusted with flour and scored dough.

TA DA! You have made your very own Dutch Oven bread. This goes along with so many lovely dishes, or eaten on its own with butter!

Finished Dutch Oven Bread.

For more help, here is a video that uses a very similar process to this recipe to help you with any steps you might be confused on along the way!

Homemade Dutch Oven Bread, Tasty


References:
Tasty, Homemade Dutch Oven Bread, https://tasty.co/recipe/homemade-dutch-oven-bread
All photos taken by —.

How to restore a wooden Mazda Miata Shift knob

Hello Everyone, Today I am going to show you how to completely restore a 1993 Mazda Miata wooden Nardi shift knob! Why spend 100$ on a replacement when you can make your current one look great with things you might have laying around the house! It will improve the feel of the shift knob and you will no longer have black residue rubbing off on your hand while driving!

Figure 1. Current Project

To complete this project you will need the following. 300, 600 and 1000 grit sand paper. Two packs of Danco Delta kitchen spout repair kits model number (80973) Your preferred wood stain, and wood lacquer finish. Gummi Pflege (a rubber seal restorer/hydrator) If you want to make it easier on yourself when sanding a single M10-1.25×100 bolt with the head cut off along with a drill press would be handy.

Figure 2. What you will need

Procedures. What to do, Step by step.

Step 1 : Remove all rubber from the shift knob. Gently remove the bottom one by pulling on it gently. The second one you can cut out using a sharp razor blade. NOTE: Be careful with razor-blades. I cut myself!

Figure 3. Cutting off the old rubber surround.

Step 2 : Back out the set screw on the metal part of shift knob if you plan on using the bolt trick for sanding. This will save you time sanding in the long run.

Step 3 : Cut the end of the bolt off with a metal saw. That way you can put it into a drill press chuck.

Figure 4. Cutting head of bolt off. I ended up using a Saws-all because it took to long by hand.

Step 4 : Thread the M10-1.25 bolt into the shift knob and put it into the drill press chuck.

Step 5 : at this point you are ready for sanding. Start with 300 grit. Get most of the old lacquer off with 300 and finish up working your way up to 1000 grit. (The lower the grit number the more abrasive the sand paper is)

Figure 5. Sanding the knob

Step 6 : Turn the drill press on and start sanding. NOTE: Be careful around the top of the knob where the Nardi logo is. You will likely have to do this by hand to preserve the logo. You cant buy a replacement anywhere.

Step 7 : once the old lacquer is sanded off and smooth. Moving up through grits you are ready for stain.

Step 8 : Apply the stain to the wooden part of the shift knob. But dont forget to shake the can before applying. 1 minute of shaking will do! Apply it, Let it soak in and wipe off after 2 minutes. Redo this 2-3 times. (quick note that once the stain drys it will lighten up)

Step 9 : After the stain has had time to dry. Usually it takes around 18 hours but make sure to read your exact instructions on the contain. Apply your spray lacquer or clear coat. Don’t be afraid to lay it on thick, avoid runs/drips.

Figure 6. Laying clear-coat/lacquer

Step 10 : At this time you can recondition the bottom rubber piece. Apply Gummi Pflege to the rubber off the knob. Let the piece soak in the product. This will make it so there is no black transfer on your hand anymore.

Figure 7. Applying the rubber revitalizer

Step 11 : Put the bottom rubber piece back on and align the new bushings in the middle of the knob to your desired feel/order. There are 3 small ring 3 big rings.

Figure 8. Final assembly

The end goal of this is to save money and use things that are probably sitting around your house already. You can brag to your friends that you redid this shift knob yourself. Not to mention it will make your interior and driving experience SO much better.

Figure 9. Finished product minus the rings.

References

https://forum.miata.net/vb/showthread.php?t=572402

https://forum.miata.net/vb/showthread.php?t=545839

How to Change Your Car’s Oil

Author: Josh Goodreid

Editor: Adam Richards

Skip To

In this video I will show you how to change your own oil. After you’re done watching this video you’ll be able to change your own oil yourself, on any car. You’ll be saving money, and you will be ensuring that a high-quality engine oil and filter is going into your car and that you know it’s getting done right. I’m also going to show that you can change your own oil for cheaper than some people think. According to G Miller in this 20somethingfinance article he says that he’s not going to change his own oil because it’s too expensive, $250 for a Jack and $25 for an oil drain pan and wrenches and so on. So I’m going to show you that you don’t need a jack and that you can make your own drain pan. You will need some wrenches but you can get them for relatively cheap($10-$20). Below is the video.

How To Change Your Oil – How To Video

Tools and Materials

First, let’s get into tools and materials that we need. Again, you are going to need some way to raise the car. In this case we’re going to be using a jack, but a jack is not necessary. One of the common methods broke college student, like me, use is to drive your car on top of a curb.

It is the cheapest and safest method because there is no chance it’s going to fall down on you, unlike a jack. Not to mention it gives plenty of room to work. you’re also going to need some kind of wrench or socket. For my specific car I need a mm socket set. This is dependent on your car because I have changed the oil on different cars and only a crescent wrench was necessary. Either way, It’s not a big difference with the crescent wrench being $10, and the sockets being $20. I also needed two Torx screwdrivers to remove a belly pan that was in the way. I think this is a Volkswagen thing so if you don’t have a Volkswagen those are not necessary. You will need some kind of razor blade or scissors to make a oil drain pan out of a jug.

Figure 2 – Homemade Drain-pan
Provided by Author

Next, You’re going to need oil and a filter we will get into what the proper one is and how to find the proper oil for your car later on. We’re also going to need gloves, paper towels, and some kind of a towel, definitely recommend a towel. It’s also recommended that you get some kind of funnel, I didn’t use one so it’s not necessary, but it would help.

Depending on your vehicle, you may need a tool to loosen the oil filter. My oil filter just has a hex so I can use a socket, but some like this metal one may need a cap type or clamp type. The metal clap types are kind of expensive, so you can instead use a rubber alternative which does the job and is a little cheaper. Just pull it tight and it will crank off. Again, if you don’t have that style of filter it’s not necessary.

Selecting The Proper Oil

Next lets look into what type of oil we need, what the types mean, and what type you need. What I have here is a 5w 30 ESP Advanced synthetic oil specific to my car, your car is probably going need something different. Let’s look into what all that means so you can pick what is best for your car.

According to Paul Weisler in this Popular Mechanics article the 5W essentially represents the oil’s resistance to thickening when it’s cold and the 30, after it, just does the opposite, It represents the oil’s resistance to thinning when it’s at operating temperature. The other thing to look at is whether the oil is a conventional, synthetic blend, or full synthetic. Keeping with the article before, conventional oil motor is just the standard grade, or the bottom, lower-quality oil. Then, you have a synthetic blend which is a mix of conventional and synthetic, and is used for heavier trucks. Full synthetic is essentially the high-quality oil and is required in newer cars today.

As tempting as it would be to get cheap conventional oil, I would recommend getting full synthetic as a minimum if you have a newer engine, because of the damage conventional may do.

Next, how to find what oil your car takes. If you look on top of the oil fill cap under the hood it should tell you what type of oil you need. If not, look in the owner’s manual and go to the section where it says engine maintenance or oil maintenance, flip to the page and It will tell you the oil specification or viscosity and the amount of oil you need. That’s also important when you’re going to buy oil because you don’t want to run out of oil while you’re working on your car and you have no way to get to the store.

Selecting The Proper Filter

All right, next we’re going to look at the types of oil filters to buy. There are two main types, one is the metal canister type which is older and usually cheaper and the newer type which is a cartridge drop-in. The important thing that you need to know is the numbers on the bottom corner of the box. These tell what type of filter it is. To find out what filter is needed for your car, here is a website (Wix filters) where you can type in the make and model of your car and search the filter by the motor.

Figure 4 – Different Types of Oil Filters
Provided by author

Draining The Oil

Now that you have the materials, we need to go jack up the car (in my case). Put a block underneath the rear tire, put the car in park and pull the emergency brake. Next, we need to jack on a piece of the frame to ensure that the vehicle lifts properly. Now the frame on my vehicle is deep inside the car. If your unsure look underneath your car and feel for metal. Jack once you locate the metal frame. Once jacked up, put jack stands underneath the car to ensure it doesn’t come down. Also give the car a good shake. If it’s going to come down you’d rather have it come down while not underneath it. Next, I need to remove a plastic belly pan, ignore if you can already access the oil pan and move onto locating the filter. As you can see here, this is my oil filter which is in front of the oil pan.

Figure 5 – Oil Filter
Provided by author

With most front wheel drive cars, the oil pan is going to be near the passenger side and is going to be a black container. The other silver one is the transmission, which you do not want. Now, you need to take the drain plug out, the location is normally toward the back, and remember lefty loosey. It might be a little hard to get off, if that’s the case, you can slide a pipe on the end of the ratchet or wrench and it will give you more leverage which helps to get it off. Put your oil drain pan underneath the plug, take the drain plug out, and let it drain for 10 to 15 minutes or at least until it’s a slow drip. Again, I would give this plenty of time because the point is to get the dirty oil out. Once you’re done, put the drain plug back in right away so you don’t forget. When you’re tightening this, put your hand really close to the socket so you have lower leverage which keeps you from over-tightening the plug. Once finished, go back and give it a small turn using the end of the wrench, just slightly.

Figure 6 – Oil Pan (red) and Plug (blue)
Provided by author

Replacing The Filter

Now on to the filter. Move the pan underneath the filter, use a wrench if you can’t get it off by hand, and unscrew and let drain into the oil pan. Once you have your oil filter out I would compare it with the new one that you bought to ensure that you got the right part. If you have a canister like I do you need to replace the O-ring seal and when you do, it’s wise to spread a little oil on it to ensure there’s a good seal and that it goes on tight without ripping or catching. Then, put the cartridge back in and reinstall. When you’re screwing this together, do it very slowly and very carefully, it’s plastic and could break very easily. You shouldn’t have to force it. If it seems hard, loosen it up and try again. I would recommend tightening it with a wrench if the filter is a cartridge type, because they leak if done by hand. If it’s the metal type ignore.

Filling With Oil

Finally, we need to fill the car up with oil. Make sure there’s nothing underneath the car like the jack stands from before and lower the car. If you’re using the curb method you can ignore this step for now. Now, we’re going to locate the engine oil cap. The dipstick is yellow and you don’t want to fill from there.

Figure 7 – Oil Fill Cap
Provided by author

This is where you can use a funnel. I have done this many times so I know that I need 6 quarts total, but your case maybe be different. So fill about a quart at a time and check the dipstick until full. If you bought oil in a gallon jug, it actually has transparent material on the handle which will tell you liters and quarts, so you know exactly how much to put in so you don’t overfill. Next, check the dipstick by insuring it is down all the way and then pulling it up and examining it with a rag. In our case it is about half-way between the low and high mark which is perfect. This is very important, start up the engine for 5 to 10 seconds to cycle the oil and make sure it fills the filter and you get the proper level. If you’re using the curb method, I would recommend driving your car off the curb and onto level ground at this point. Once the vehicle is shut down, it is normal for the level to drop by about one quart. Fill and check the oil level until full.

Figure 8 – Filling Oil To The Proper Level
Provided by author

Summing Up

Well congratulations, you are almost done. Close the hood, if you have any extra oil I would put it in the trunk, you never know when you might need it, and dispose of any oil and trash properly. Throw any trash away and bring the used oil to your local recycling center.

Now lets look at the total amount I spent. According to Amazon 5 W 30 oil is $20, the Jetta filter was $8, the crescent wrench is $10 and a socket set is $20. Total is $48 and obviously once you have the tools you don’t need to buy them again. So, the future cost is only $28 for the oil and filter. Now, let’s compare this to the cost of a professional oil change. According to a Car and Driver article with a Mazda Miata tested in Michigan being brought to multiple local shops. The price ranged from $69 to $95. On the high end, that is $67 cheaper.

All in all, you save some money and you get to have some fun along the way. Thanks for reading and I hope you learned something.

References

Weissler, Paul. “How to Navigate the Confusing Task of Picking the Right Motor Oil.” Popular Mechanics, Hearst Digital Media, 18 Oct. 2019, http://www.popularmechanics.com/cars/car-technology/a53/what-oil-does-my-car-take/.

Miller, G.E. “DIY Oil Changes: Are the Cost Savings Worth It?” 20somethingfinance.Com, 20somethingfinance.Com, 21 Jan. 2019, 20somethingfinance.com/diy-oil-change-cost-savings/.

Ceppos, Rich. “How Much Does an Oil Change Cost?” Car and Driver, Car and Driver, 6 Mar. 2020, http://www.caranddriver.com/shopping-advice/a27380975/how-much-is-oil-change/.

How to Change a Tire

Changing a tire

In this Vlog I will demonstrate how to properly change a flat tire without roadside assistance. Having a roadside assistance service come out to your location to change a tire could cost you anywhere between $50.00 – $200.00 depending on distance and situation. Even with roadside assistance there could be a deductible that needs to be paid from $10.00 – $30.00. Not only is there a financial burden that potentially comes with a flat tire, there is also the time involved digging through your glove compartment finding the correct number to call. Then you must make the call, and in some rural areas it becomes more difficult to get ahold of a certified driver that your roadside assistance company uses. After this process, there is then the wait, depending upon the situation and how busy they are you could wait for well over an hour. The average wait time is about 48 minutes, though as stated above this can fluctuate based on the situation. Depending on your knowledge and ability, a tire change should only take 20 – 45 minutes when done independently. It is always a good idea to check your equipment and even practice changing a tire once a year. The main thing to be aware of is making sure that you have the proper equipment and that the spare tire is filled to the recommended pressure and ready to be used. With this being said roadside assistance is a great resource to have, though it is always good to know how to handle a situation yourself, being you never know what circumstances you will find yourself in. There are so many things that can happen while we are traveling where roadside assistance is needed, like total mechanical failure, alternator stops charging, or your axel sheers off. These are some but not all of the potential hazards of driving a vehicle, these specific situations are not a quick fix and roadside assistance will be needed.

  • Materials needed
    • Flat tire
    • Owner’s manual
    • Vehicle jack (used to lift the car off the ground)
    • Lug wrench used to remove the lug nuts
    • Spare tire
    • A little elbow grease.
  • Steps
    1. Notice flat tire
    2. Pull over to the side of the road or a parking lot if able. (Drive slowly and as little as possible on a flat)
    3. Locate flat tire. (give a kick, and insert expletive narrative)
    4. If available find owner’s manual (should be in glove compartment)
    5. Find the section for changing a flat tire. This area should explain where to find the spare tire, jack, and tools needed. It should also, explain the general steps for changing a tire.
    6. Locate all the materials needed and remove it from the vehicle and stage it next to the tire that is going to be changed.
    7. Set up the jack and lift just till there is pressure on the jack.
    8. Break lug nuts loose.
    9. Finish jacking the vehicle up until the tire is approximately 3-5 inches off the ground.
    10. Remove the lug nuts.
    11. Remove the flat tire.
    12. Put spare tire on the vehicle.
    13. Put lug nuts on snugly. (this is best done in a star pattern)
    14. Let the vehicle down and remove jack.
    15. Finish tightening the lug nuts.
    16. Return equipment to vehicle and get back on the road.
  • End goal (Tire changed)
  • References
    1. “2018 Ford Escape Owner’s Manual.” OwnerManual, ownermanual.co/manual/2018-ford-escape-owners-manual/.
    2. Ernie. “Flat Tire Change: Roadside Assistance Tow Truck: Duluth Auto Towing.” Towing in Duluth GA, Duluth Auto Towing, 24 May 2019, http://www.duluthautotowing.com/roadside-assistance/flat-tire-change/.
    3. “How Much Does Roadside Assistance Service Cost? – CostHelper.com.” CostHelper, cars.costhelper.com/emergency-road-service-assistance-cost.html.
    4. Https://Www.wardsauto.com/News-Analysis/How-Long-You-Wait-Roadside-Service-Depends-What-Youre-Calling.
    5. “Roadside Assistance & Towing.” Roadside Assistance & Towing Service | Tires Plus, http://www.tiresplus.com/roadside-assistance-and-towing-service/.

Ice Fish for Whitefish

Rex Meikle

4/4/2020

As the last bit of ice on most lakes melts away, I find myself writing about one of my favorite things to do during the long, cold, dark winters of Wisconsin. I’ll be teaching you, the reader, how to fish for one of the best tasting, and nutritious fish found in the Midwest, the Lake Whitefish. This article is for the novice fisherman, or someone looking to get into fishing, without having to spend much money on the best gear, bait, or clothing. You may be wondering why? Why is knowing how to ice fish, or more specifically, ice fish for Whitefish an important skill to learn? Well, I’ll tell you why. Being able to harvest your own, healthy, sustainable food is very important. When times get tough financially, or food is scarce, having a freezer full of locally sourced, wild, organic food is very valuable. Having the knowledge and skill to harvest your own food can provide a sense of safety and security that you can live with. Secondly, Lake Whitefish is incredibly healthy. Whitefish is high in omega-3, protein, and relatively low in calories. The taste is what truly sets whitefish apart, the soft, white, large flake, fillets of this delicacy taste truly delicious. For more about eating Lake Whitefish look at https://eatwisconsinfish.org/fish-list/lake-whitefish/ . Lastly, knowing how to ice fish is important so that you have a healthy hobby to get through the long Midwest winters. To escape the cabin fever, turn off your TV and video games, and get outside, socialize with others, and fish. Ice fishing can be a mentally and physically positive activity to engage in during the cold winter months.

Before you jump hook line and sinker into this article, first I have laid out a materials list of essential items needed to ice fish for Whitefish.

Tackle:

            Ice fishing rod- A medium action to medium light action works best. You need a rod that is sensitive enough to feel the bite, but strong enough to set the hook and land the fish.

             Reel- A spinning reel equipped with monofilament (8-15lb test), or braided line (10-30lb test) with a fluorocarbon liter leading to lure would be best.

            Bait/Lure- A small spoon (Swedish pimple), or Rapala Jigging Rap (use a smaller 1 ½-2 ½ inch size), and wax worms from a local bait shop are a must. As far as color goes, gold, blue/purple, and white have been the most successful for me. Fish can be color specific some days where they only bite on one color.

Clothing:

            Bibs- They need to be able to cut the wind and be waterproof or somewhat waterproof at pant bottoms.

            Boots- They should be above ankle, insulated, waterproof, and comfortable.

            Socks- Large wool socks are recommended to stay warm.

            Jacket- It needs to be able to cut the wind, and have pockets, a hood is always a good plus as well.

Sweatshirt/Sweater- A warm, thick, water resistant material with hoodie, or thick wool sweater would be my recommendation.

Hat- It needs to cut wind and cover your ears.

Mittens- They need to be waterproof, lined, and big enough to wear thin gloves under.

Why so much wool? Wool is one of the only materials that will keep you warm even if it gets wet, in fact it keeps you warmer when it is wet. If worst case scenario you get wet, wool will keep you warmer than any other material. For more on wool visit https://survivalcommonsense.com/best-winter-clothing-fabrics/.

Other Materials:

            5-gallon bucket- For carrying your gear out, and then sit on top of.

            Seat pad- They keep your butt warm, add comfort, and increase the time you are able to stay out fishing.

            Ice pick/auger- An auger will drill holes faster, but requires fuel, know how, and sometimes can be unreliable. On the other hand, an ice pick only needs a little effort, and warms you up in the process.

            Ice scoop- To get ice out of fishing hole without using your hand.

            Crampons- Should be put on under boots to increase traction and decrease slipping.

            Food and water- Bring along to keep you hydrated and energized for prolonged fishing.

            Hand warmers- Use when you just can’t take the cold anymore.

Now that we know why it is important to know how to fish for Whitefish, and we know the materials necessary, let’s get into the procedure of how to fish for Whitefish.

Step 1: Plan

            Step one is to find a depth map of the area you are fishing. On the map you need to find areas where the depth goes from very deep to drastically shallow. Such areas are called shoals, or shelves and Whitefish feed on prey on the steep bottoms of these features. Locate one that is close to shoreline if possible. Finding a close spot reduces walking distance, and if something were to go wrong it is safer to be close to shore. https://www.oceangrafix.com/chart/zoom?chart=14910 here is a map of the bay of Green Bay one of the best places for fishing Whitefish in the Midwest, and the area in which I fish for Whitefish personally.

Step 2: Find a partner

            Step two is self-explanatory, find a partner. It is much safer to fish with someone else and to bring a cell phone with you. You want to bring someone with you that you trust, and preferably someone with as much, or more fishing knowledge than you. Once you have a good partner you can enjoy years of fishing with him or her. If you do not bring a partner you need to bring a cell phone and tell a reliable person when you are departing and when you will return by, as well as where you are going.

Step 3: Wake up early

            Step three is critical to success as Whitefish feed most actively in the morning. The best time to be fishing for them is from 9-11 am, 10 am being the peak. You need to be on the ice and actively fishing at this time so figure out what time you need to wake up to get ready, pack, eat, drive, find a parking spot, walk out, and set up. Generally waking up at 6:00-6:30 is a good time to be up by if your fishing spot is within a 15 minute drive and the walk out to the spot takes no longer than 20 minutes. It is always a good idea to eat some breakfast before going out as well, coffee never hurts either.

Step 4: Arrival and Set Up

            Drive to a public boat launch, or park where you can legally park and pay dues if needed. Next you will have to check ice conditions prior to walking out. This can be done online, or by asking fellow fishermen. When walking out stay on ice roads or trails. Do not walk near islands, points, moving water, cracks, or ice shelves as they often have unsafe ice. Find your previously selected spot and move at least fifty feet from other fishermen. Drill your hole or chip it out. Your hole for Whitefish should be at least 6 inches in diameter, but can be up to 10 inches wide. Tie your selected lure onto your line with a fisherman’s knot. If you need help with the fisherman’s knot click this link https://www.wroxx.com/tie-fishermans-knot/. Fill lure’s hooks with wax worms, Whitefish love wax worms.

Step 5: The drop

            Sit down on your seat cushion atop your trusty five-gallon pale a comfortable distance away from your hole. Next drop your line down the hole. Reference the spinning reel diagram if needed http://www.seafishinghowto.com/fishing/articles/types-of-fishing-reels.html. By spinning the drag mechanism, adjust the drag of your line so that it can pull out without breaking, but not allowed to pull out very easily. By lifting the bail arm drop the line into your hole. You want your lure to hit the bottom. Once on the bottom flip the bail arm on your spinning reel back over and reel clockwise until line is tight.

Step 6: Jigging

            Once your lure is on bottom, drag is adjusted accordingly, and line is tight the next step is to jig. Jigging is the process of lifting your lure up and down to attract fish. Whitefish are a species that eat off the lake bottom, so jigging is essential to being successful. You want to make fluid, consistent lifts of the rod up and down. Around three jigs per ten seconds is a good tempo to jig at. You want to really focus on lifting that lure up and letting it hit the lake bottom hard. By hitting the lake bottom hard it will create a cloud of sand, or sediment, this mimics what happens when schools of baitfish or other prey gather at the lake bottom. Whitefish are naturally attracted to this. In addition, the vibrations of the lure hitting the bottom draws in fish as well.

Step 7: The catch

            You are jigging along as instructed when suddenly, bam, you feel a pull on your line. What do you do? You are taken by surprise, excited, and caught off guard. At this moment you need to set the hook. This saying means to tighten up the loose line and lift the rod tip up abruptly. By tightening the line and lifting the rod quickly you drive the hook deeply into the mouth of the Whitefish. Next you need to reel clockwise and keep the rod tip pointed upwards to prevent the fish from spitting out the hook or shaking loose. When you get the fish to the hole you need to watch that the line doesn’t rub against the sharp edges of the hole. You want to get the fish’s head into the hole facing upwards towards you. Grab the fish by the head or use a scooping motion to get the fish out of the hole and on top of the ice. Remove the hook from the mouth of the fish and by looking your local regulations decide if you can legally keep the fish. Then, decide to keep the fish, or not.  If you decide to release the fish place the fish back in the hole gently with the fish entering headfirst.

Congratulations! You now know how to ice fish for Whitefish. From materials needed, planning, set up, fishing techniques, and finally, to how to land a big one. I hope that you take away something positive from this article. Next winter, find a buddy, grab a rod and bucket, and get out on the ice to wet a line. Happy fishing!

References

Eat Wisconsin Fish. (n.d.). Lake whitefish – Eat Wisconsin fish. Retrieved from https://eatwisconsinfish.org/fish-list/lake-whitefish/

Leon, L. (2019, September 18). Best outdoor clothing fabric for winter and summer. Retrieved from https://survivalcommonsense.com/best-winter-clothing-fabrics/

Oceangrafix.com. (n.d.). Nautical chart viewer: Lower green Bay;Oconto Harbor;Algoma. Retrieved from https://www.oceangrafix.com/chart/zoom?chart=14910

Sea Fishing How To. (n.d.). Types of fishing reels – Baitcasting, spinning, Spincasting, electric and other reels. Retrieved from https://www.seafishinghowto.com/fishing/articles/types-of-fishing-reels.html

Wroxx. (2018, March 8). How to Tie a Fisherman’s Knot. Retrieved from (https://www.wroxx.com/tie-fishermans-knot/

Design a site like this with WordPress.com
Get started